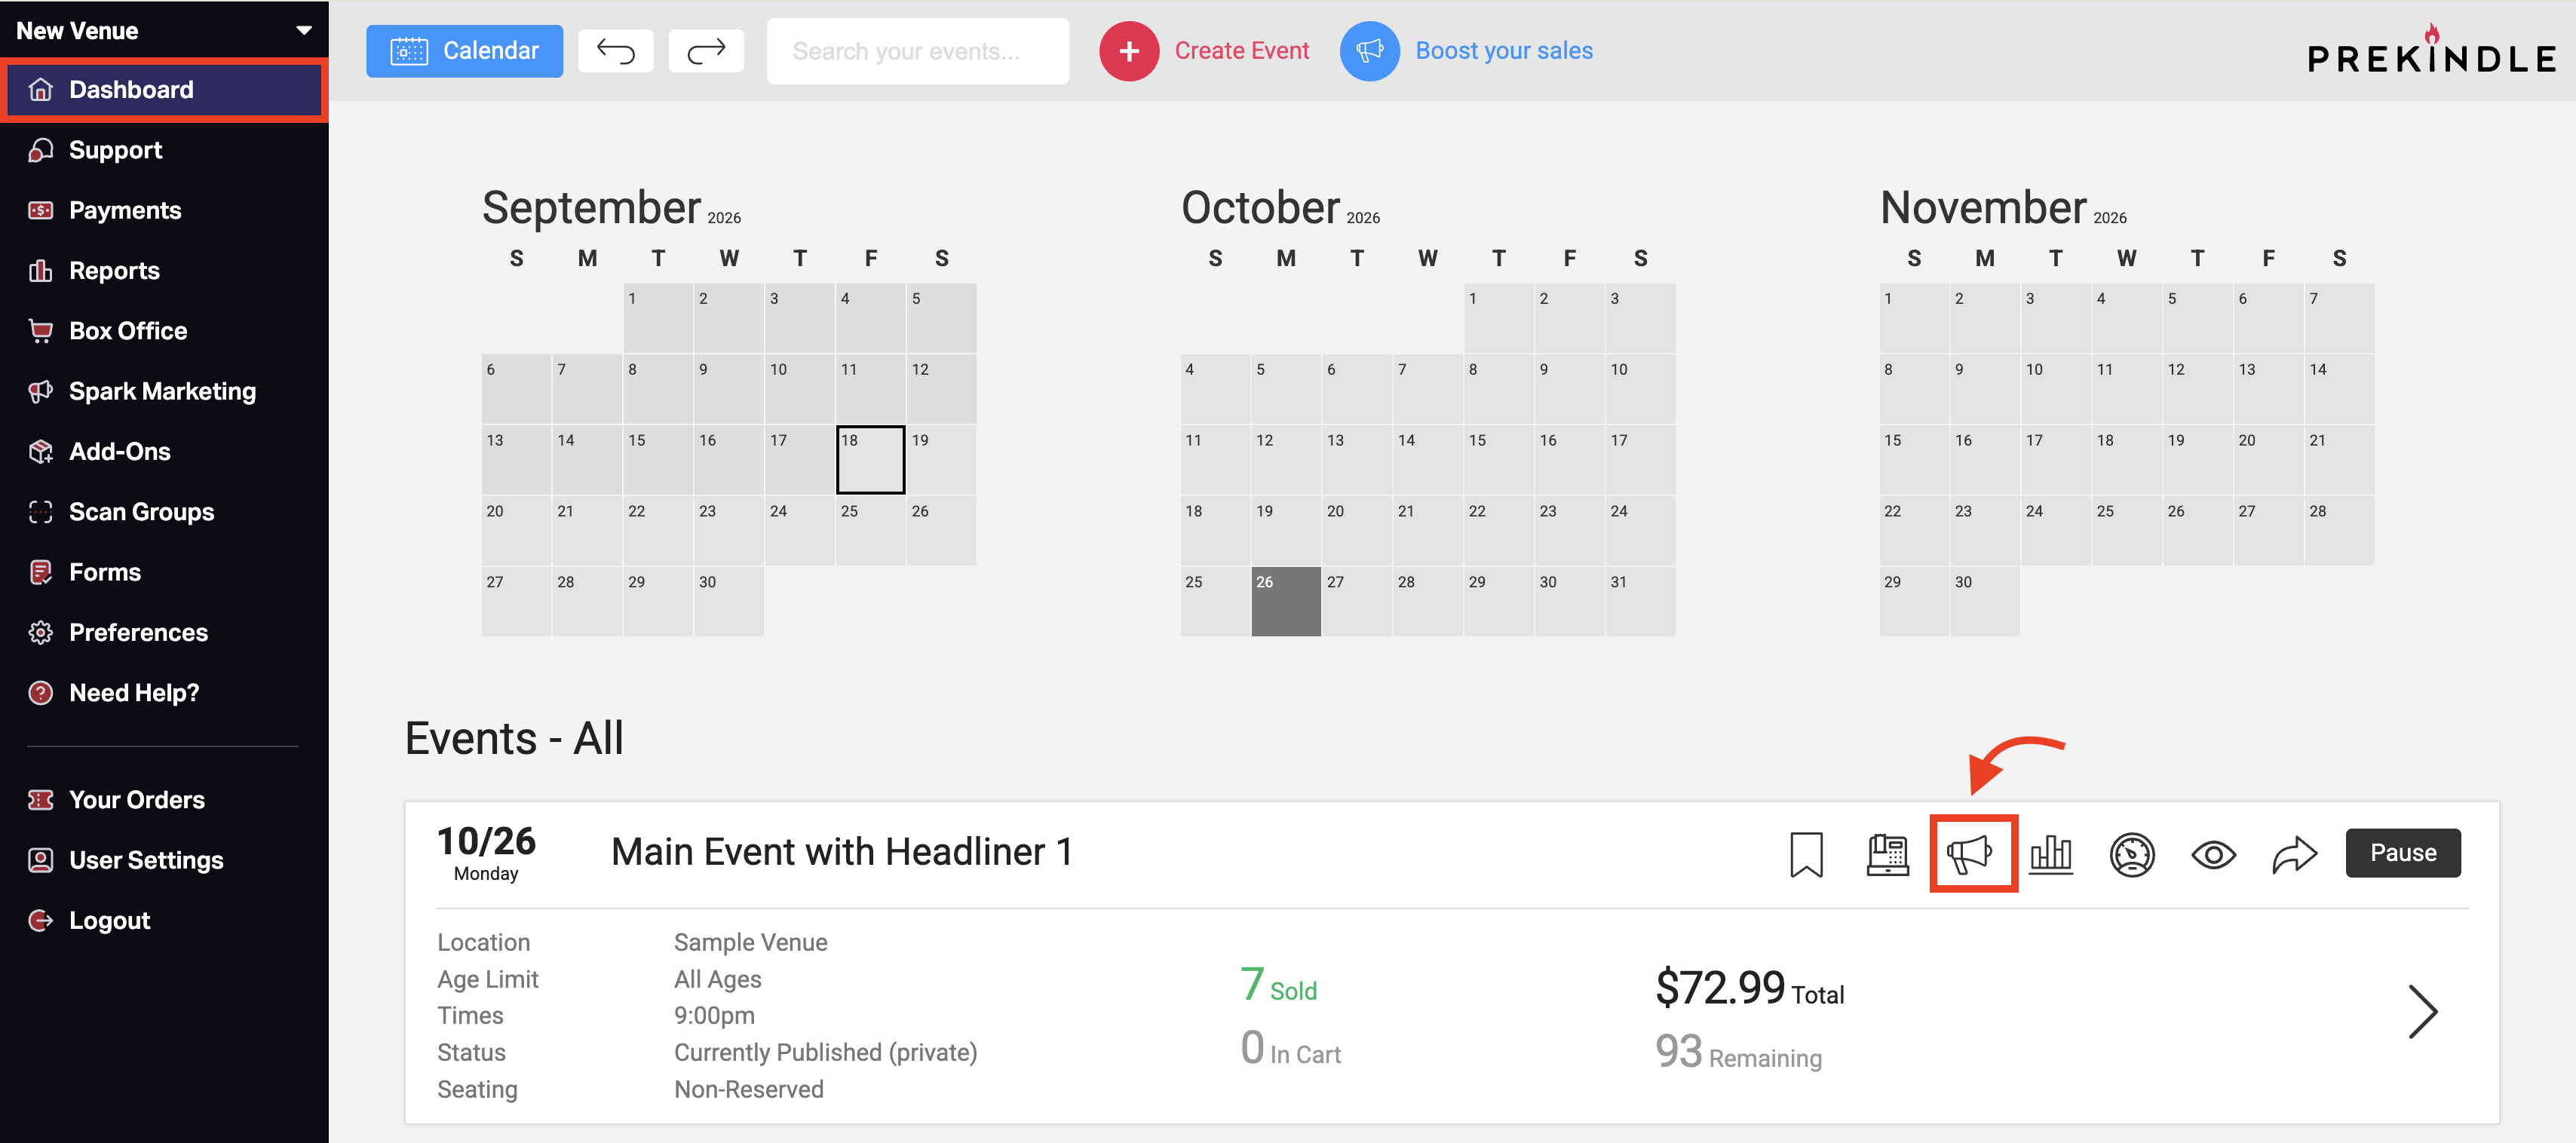
To view the Event Feed, make sure you are logged in to your Prekindle Dashboard. The Event Feed can be accessed by clicking the Megaphone Icon on the event you'd like to view.
All information provided under the EVENT INFO tab can be edited by the organizer in 2 ways:
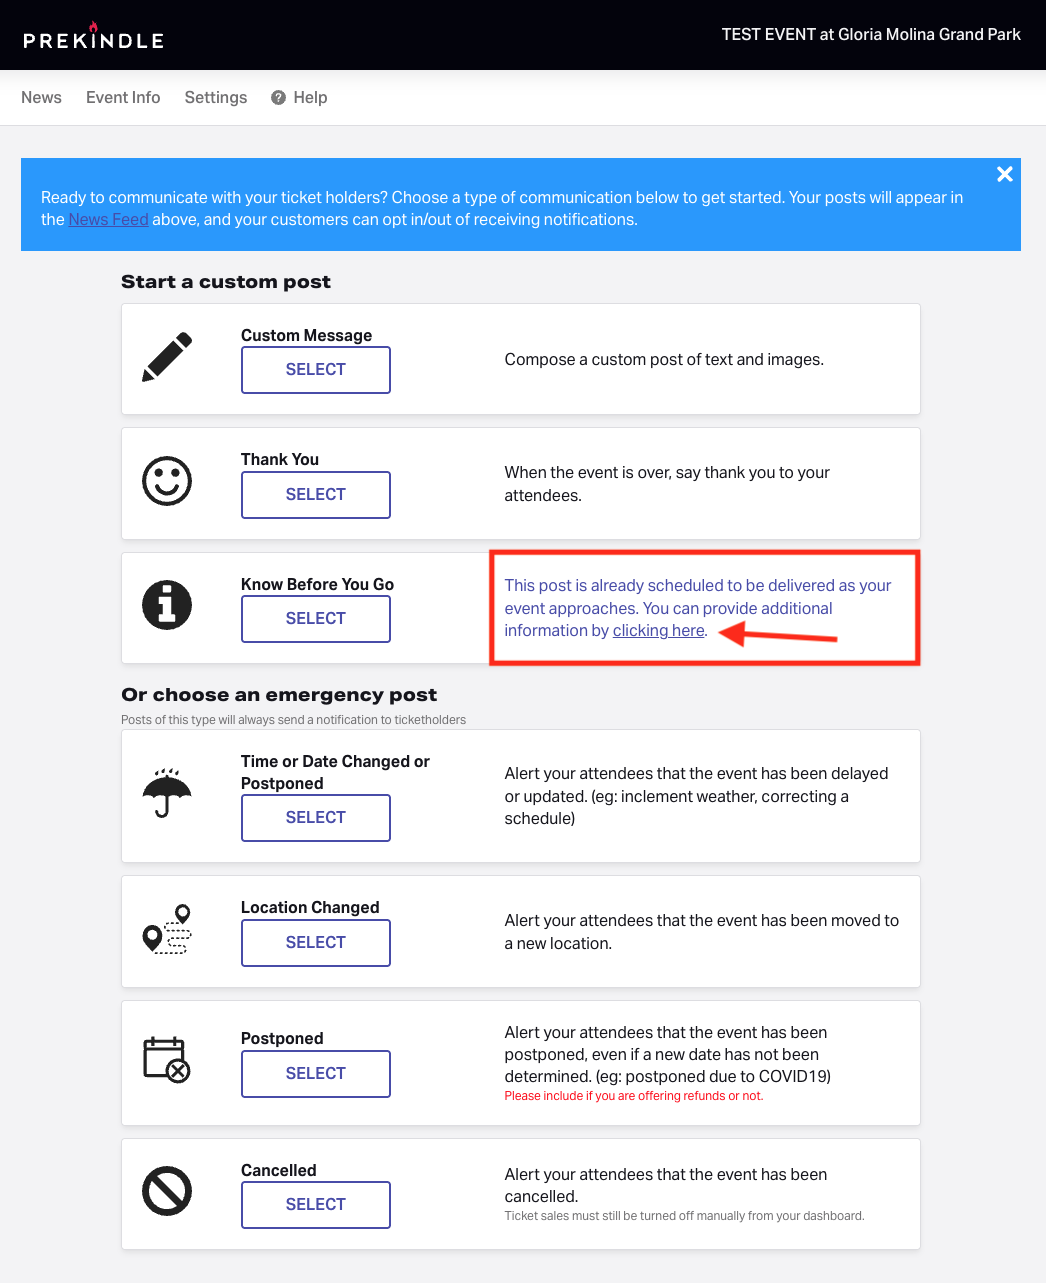
- Click the link provided in the Know Before You Go description on the Event Feed Tools page. (A)
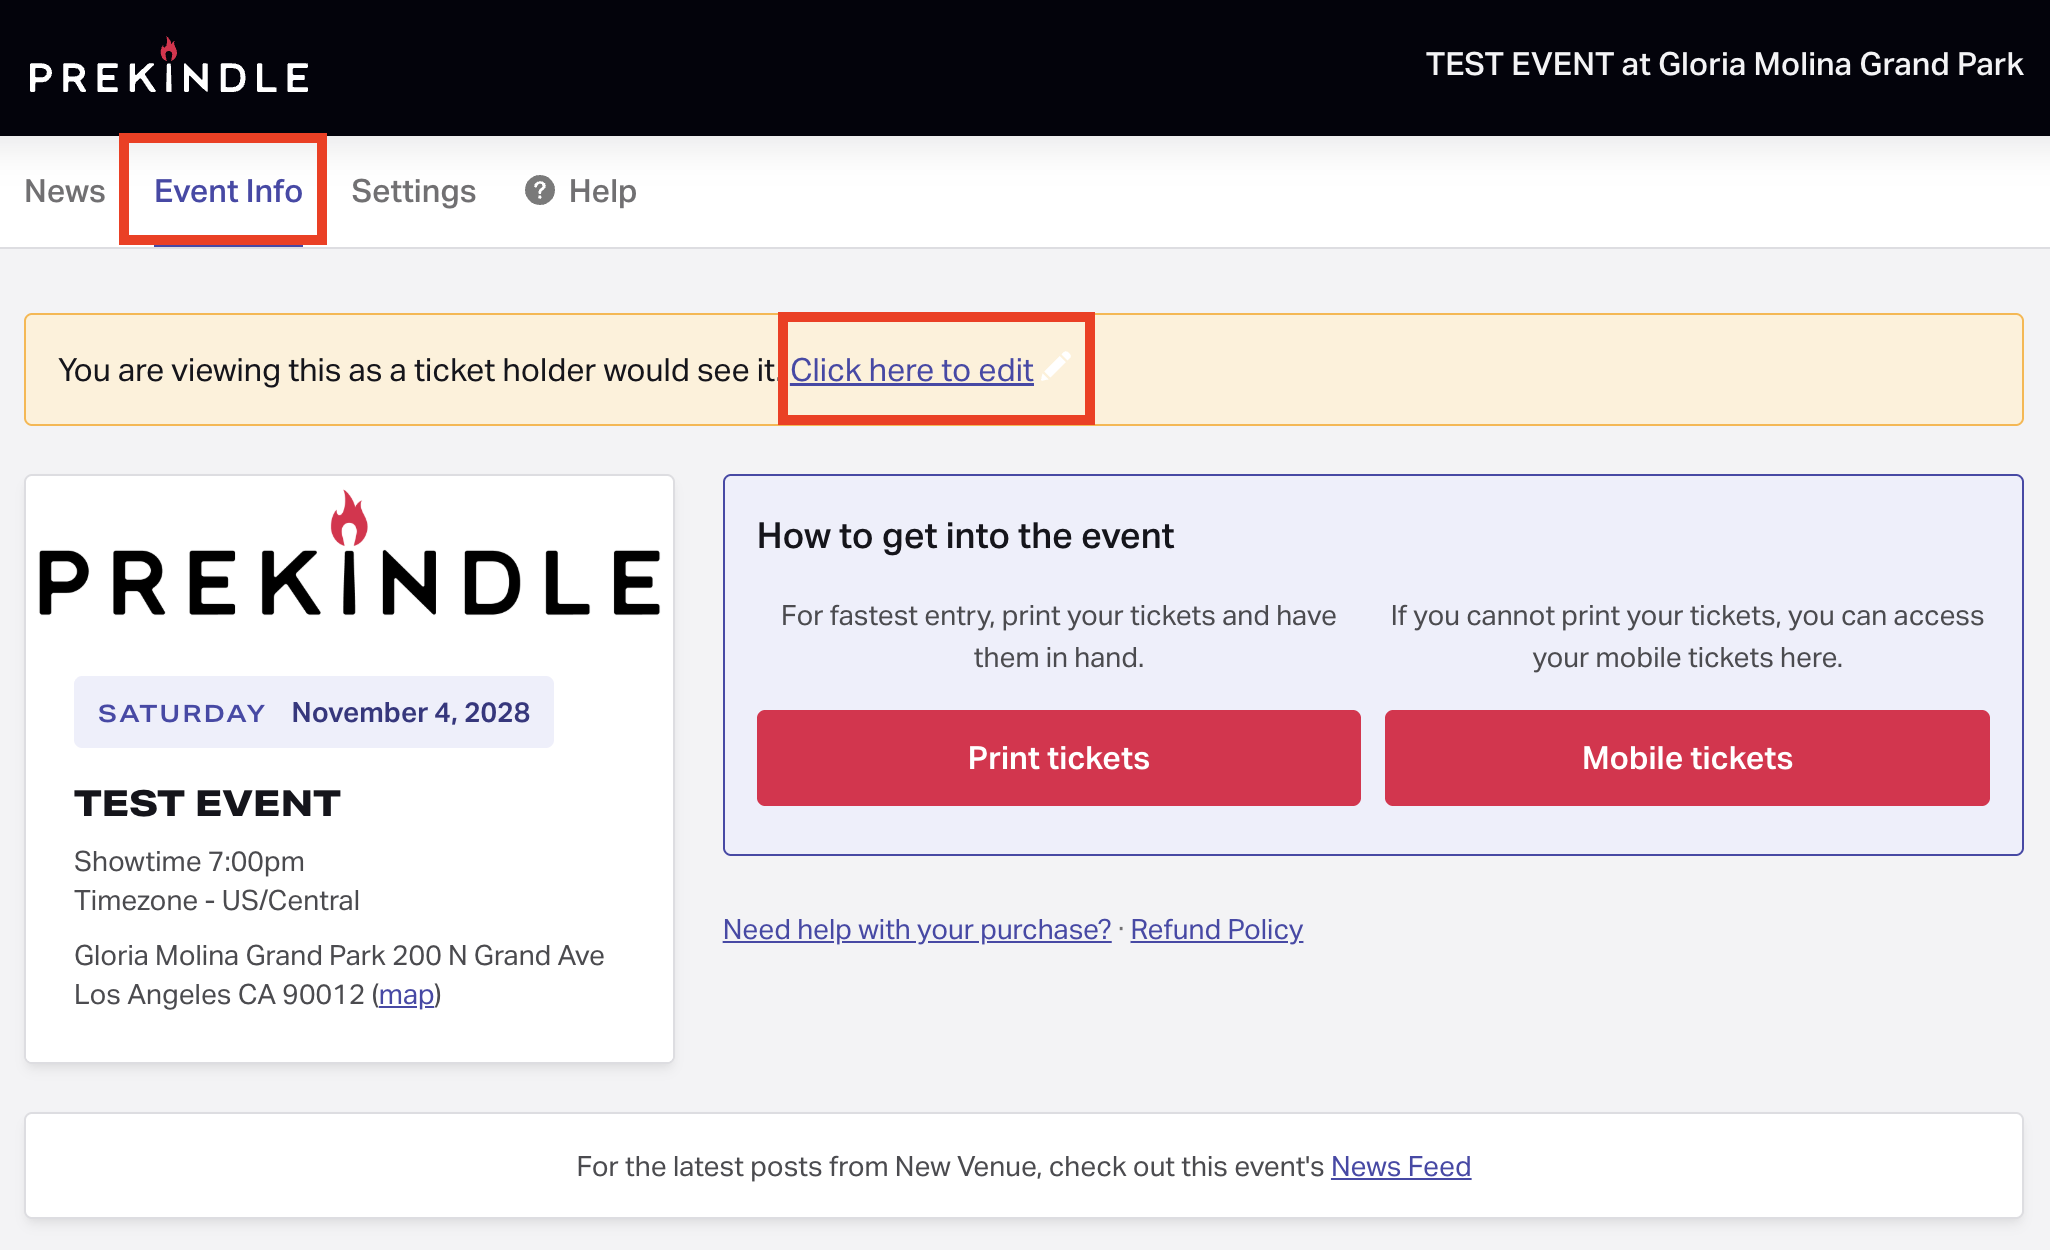
- Click the Click here to edit link provided in the orange banner at the top of the Event Info page. (B)
A
B
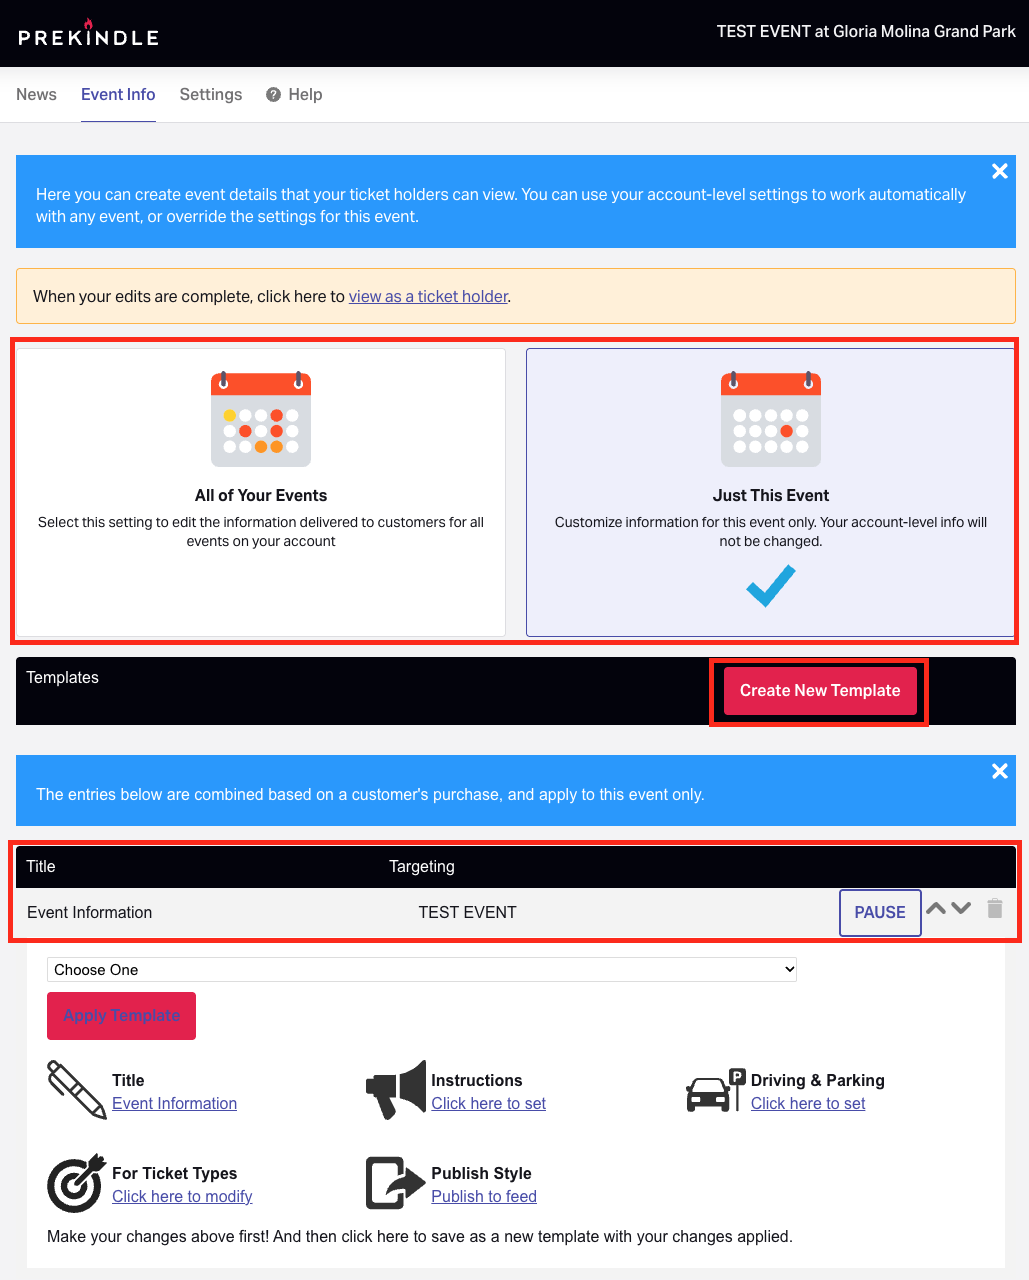
Here, you can create and edit event details for your ticket holders to view.
- First, choose whether you would like to update the information found in the Event Info/Know Before You Go for all of your events or just for the event you are currently working on.
- If you find yourself needing a variety of Know Before You Go/Event Info messages that you will reuse regularly, you can click Create New Template after completing the following steps. You can then reuse this template for future events without needing to start from scratch.
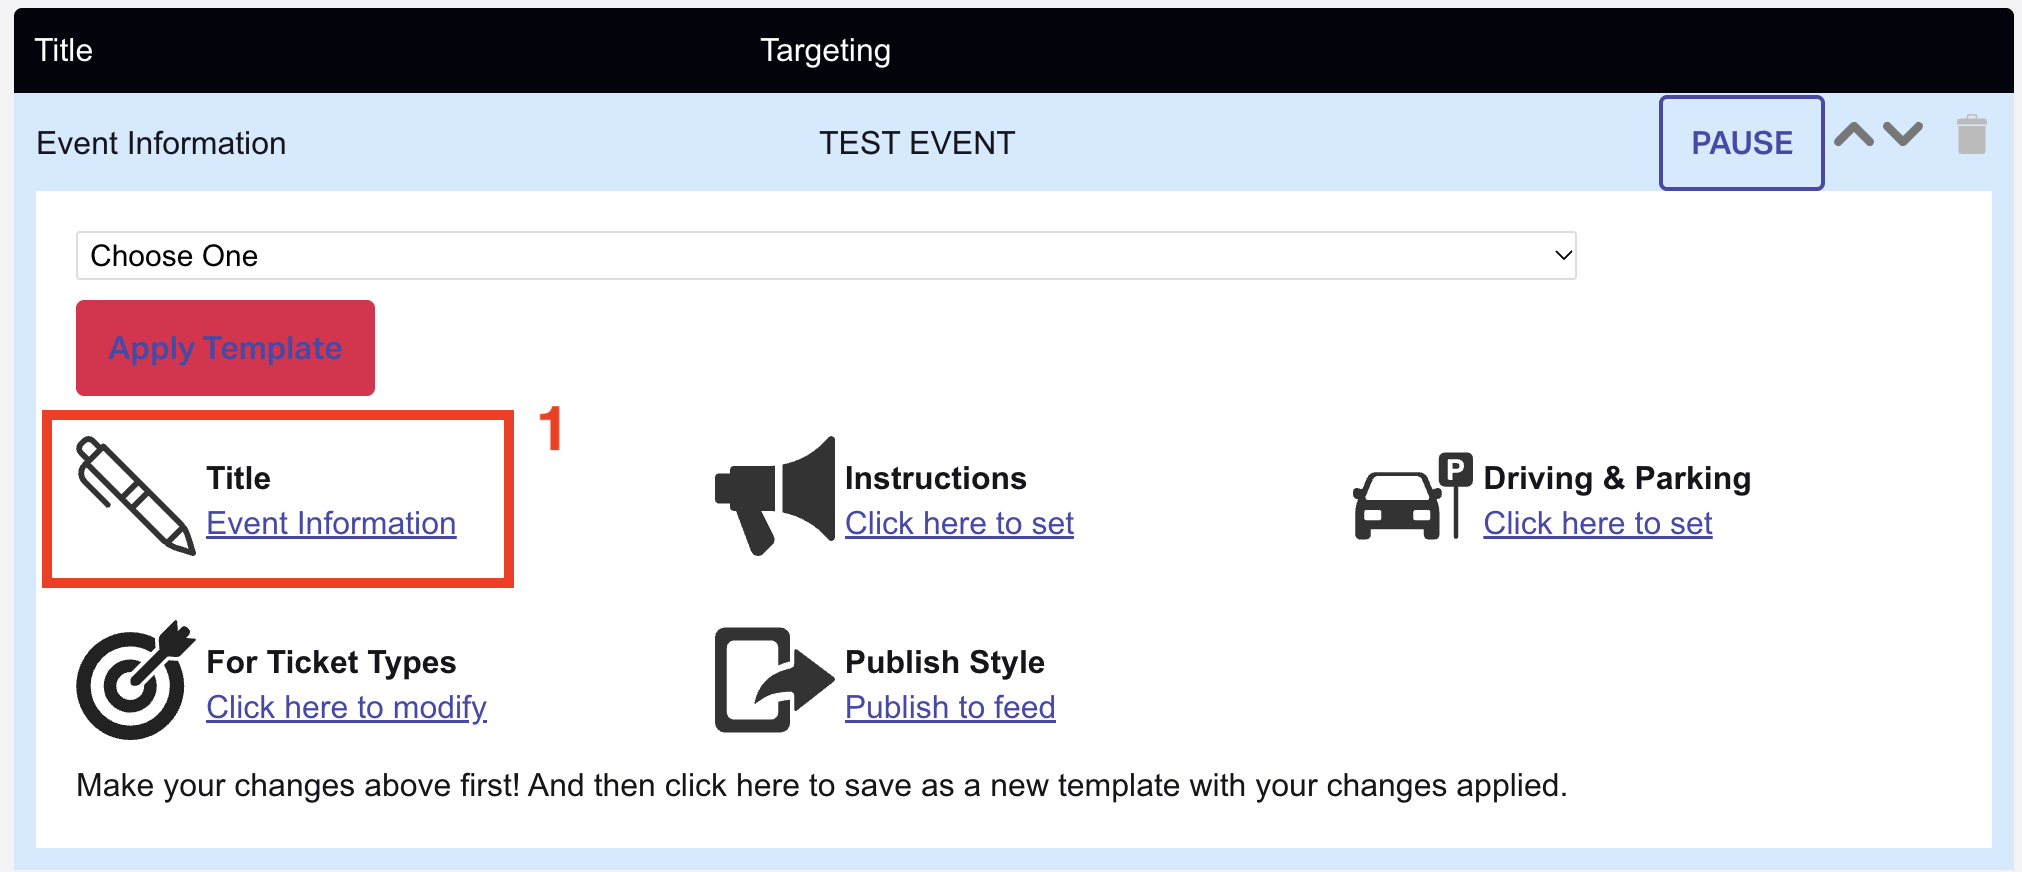
- Click the Event Information banner to add or edit the basic event information. Each entry can be given a specific title and directed to a specific group of ticket holders if necessary.
Edit the Entry Title
- Click Event Information under Title.
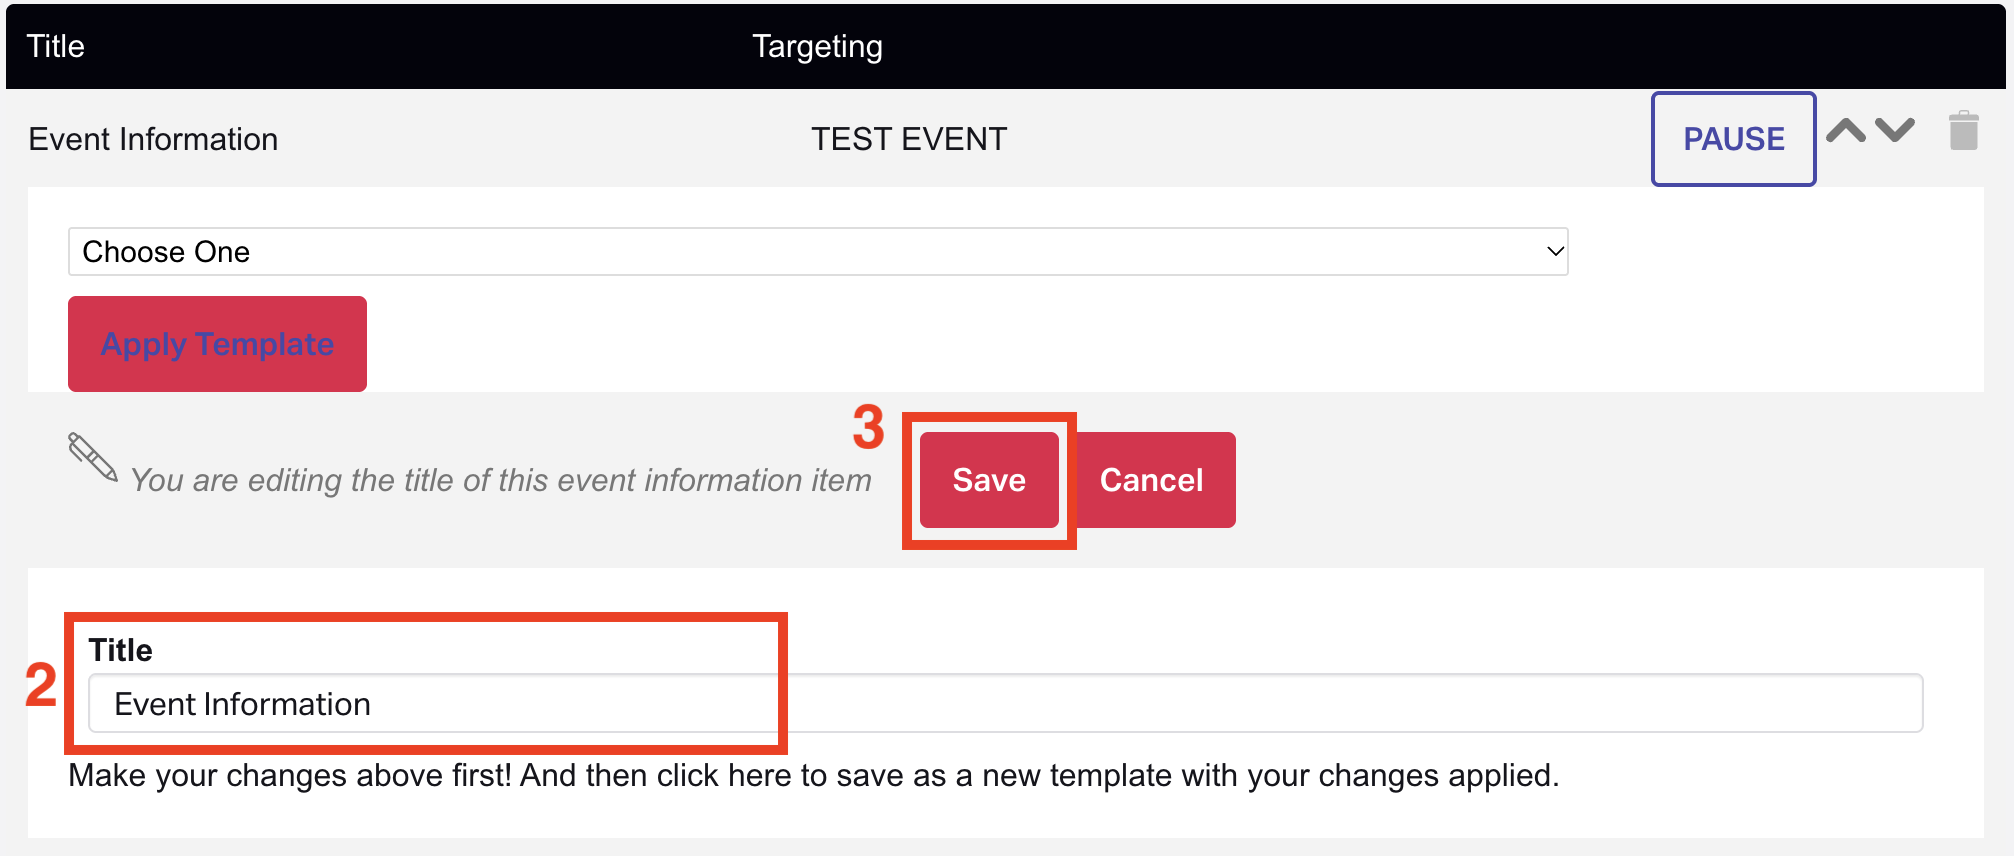
- Type in the new title.
This can help you keep track of what type of information is being added or designate who the information is directed to. For example, an entry titled "Event Information" may include information useful for all ticket holders, while an entry titled "VIP Entry Info" may only be useful to VIP ticket holders. These titles will be visible to customers on the Know Before You Go event information page.
- Click Save.
Add or Edit Instructions
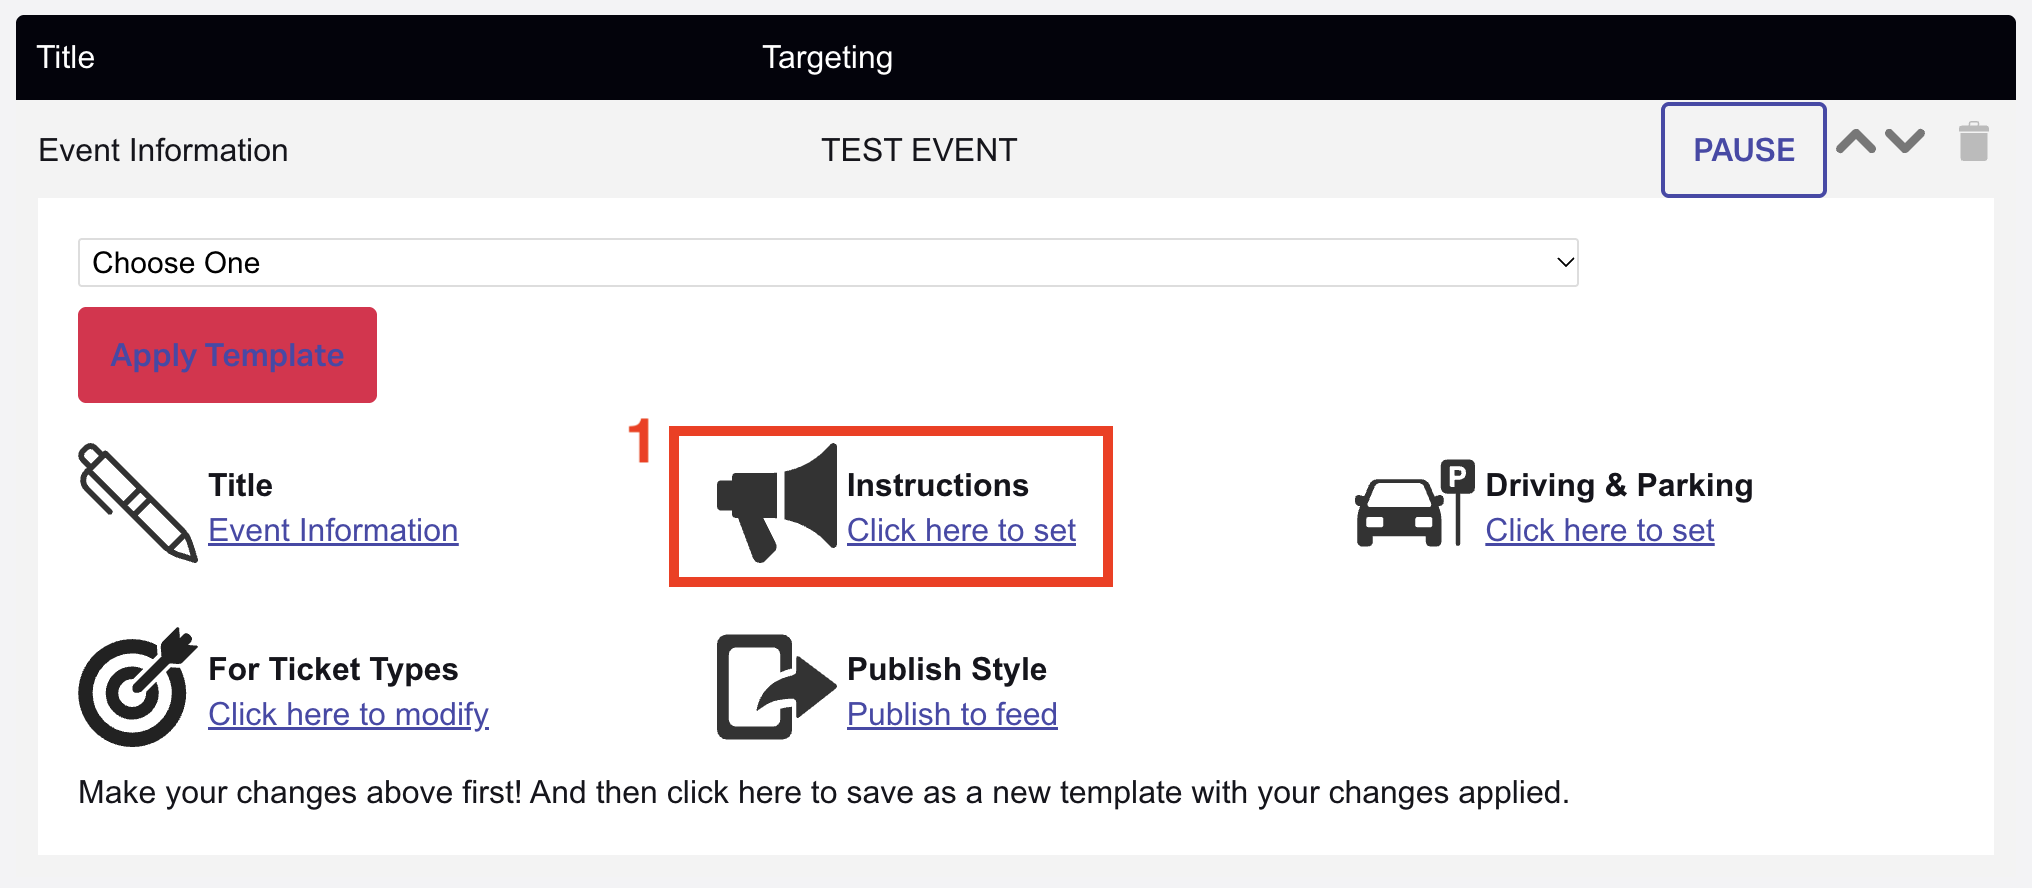
- Click Click here to set under Instructions.
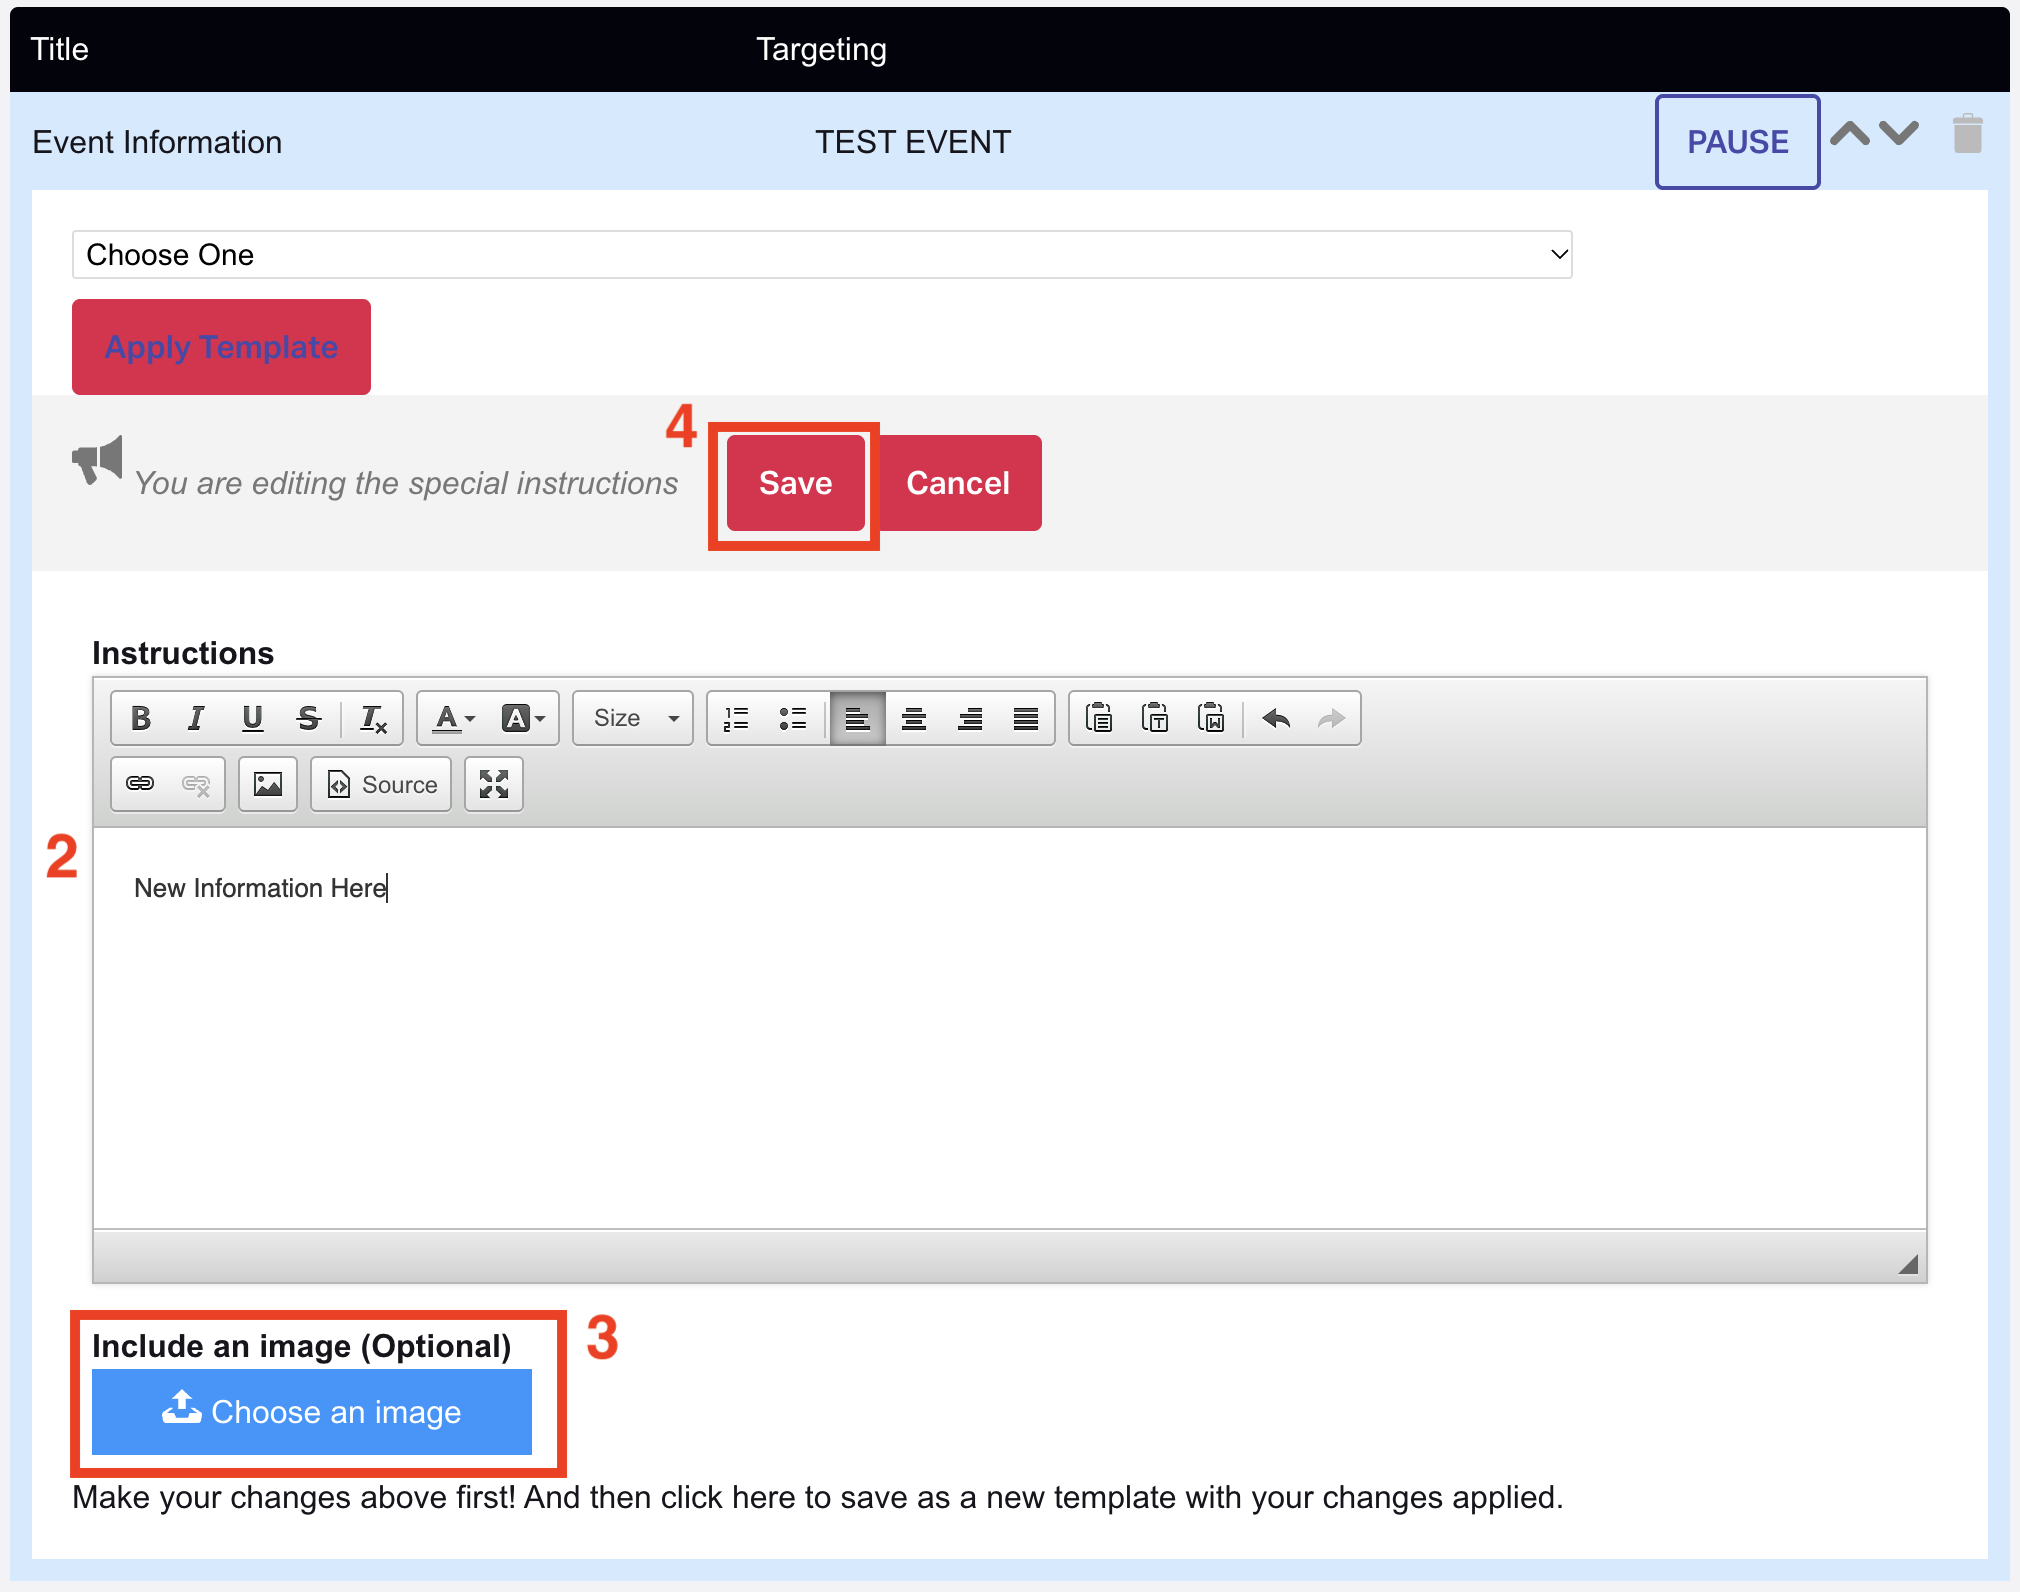
- Provide any additional information or details that may not be included in the basic information provided through the event page.
Helpful information to include here might be an event schedule, set times, or specific entry instructions. For example, "Tickets will be exchanged for wristbands upon entry. Don't lose your wristband, as it cannot be replaced."
- Images can also be added by clicking the Choose an Image button to search files on your computer.
- Click Save.
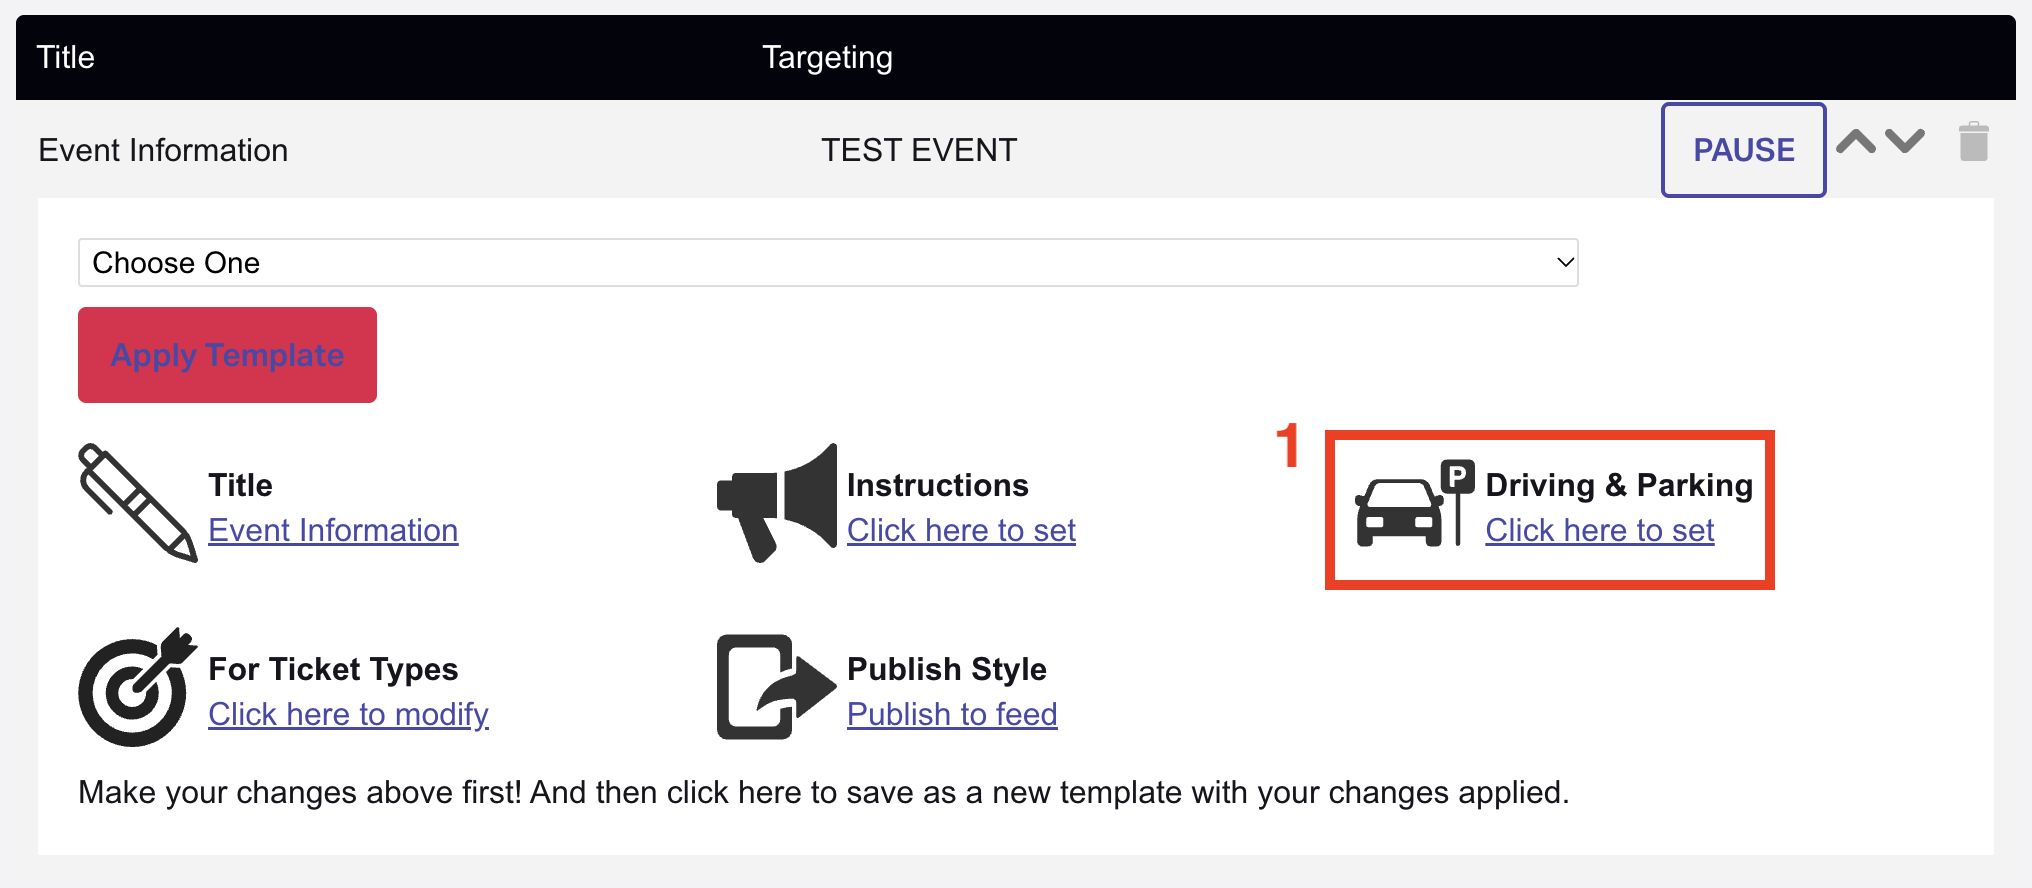
Edit Driving & Parking Information
- Click Click here to set under Driving & Parking.
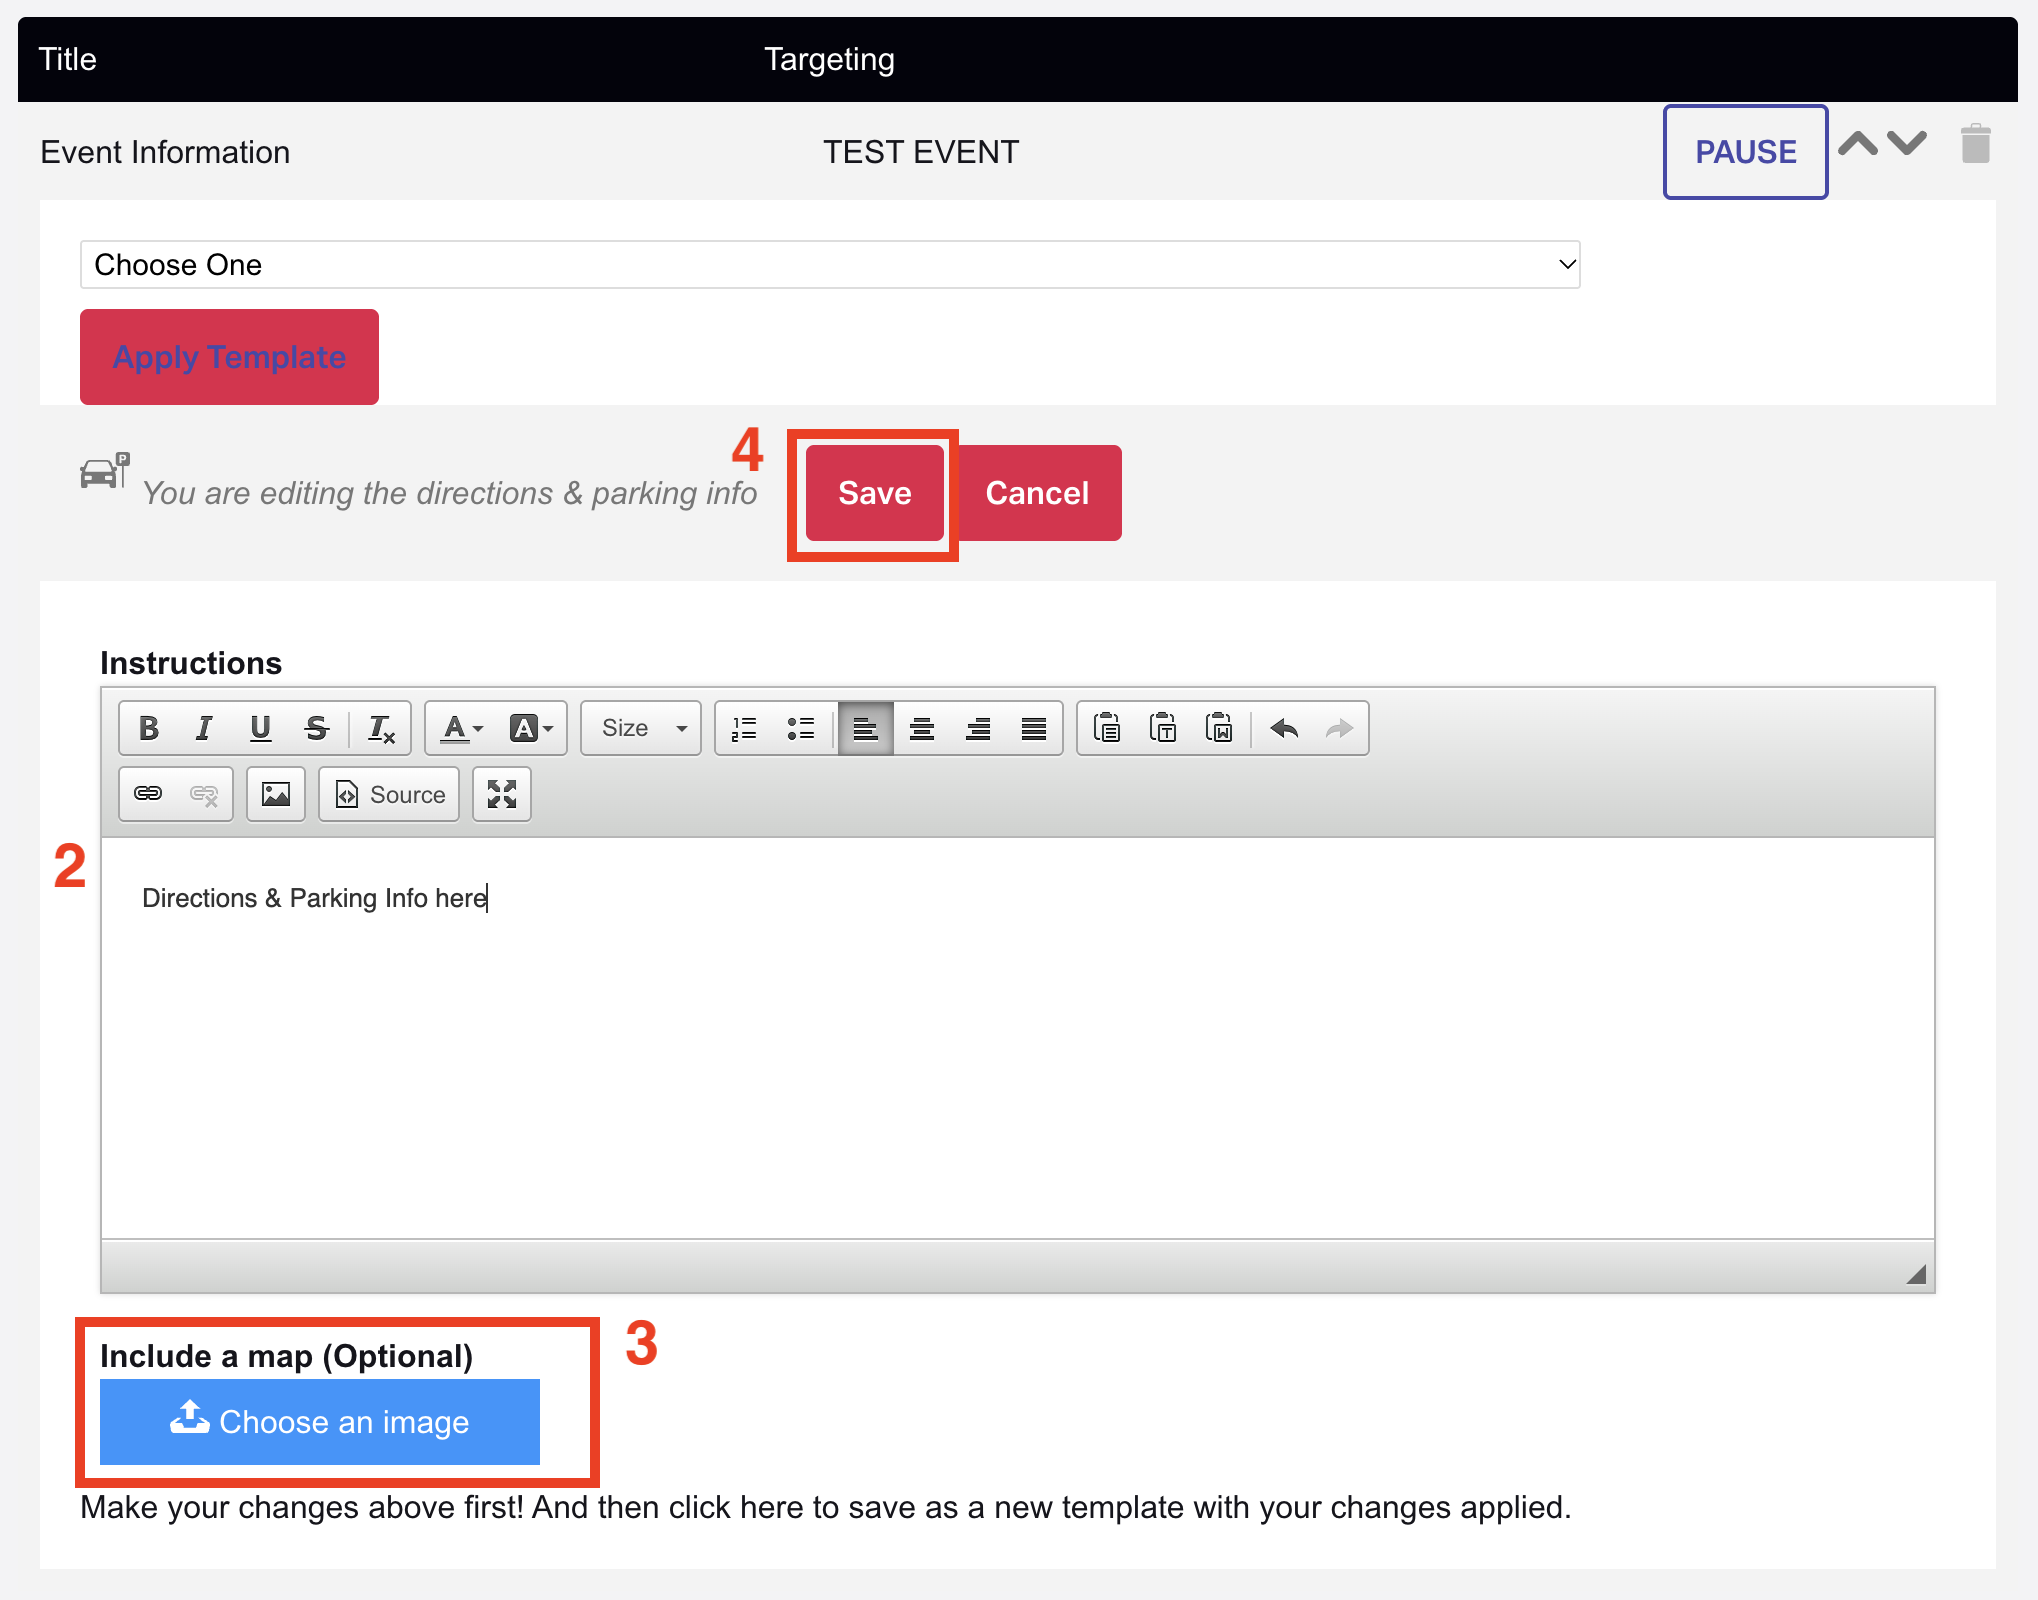
- Provide any driving and parking information that may be helpful to attendees.
Helpful information to include here might be where attendees can expect to find parking, how much parking will cost, or other transportation details, such as Uber/Lyft discount codes.
- Images, such as parking or directional maps, can also be added by clicking the Choose an Image button to search files on your computer.
- Click Save.
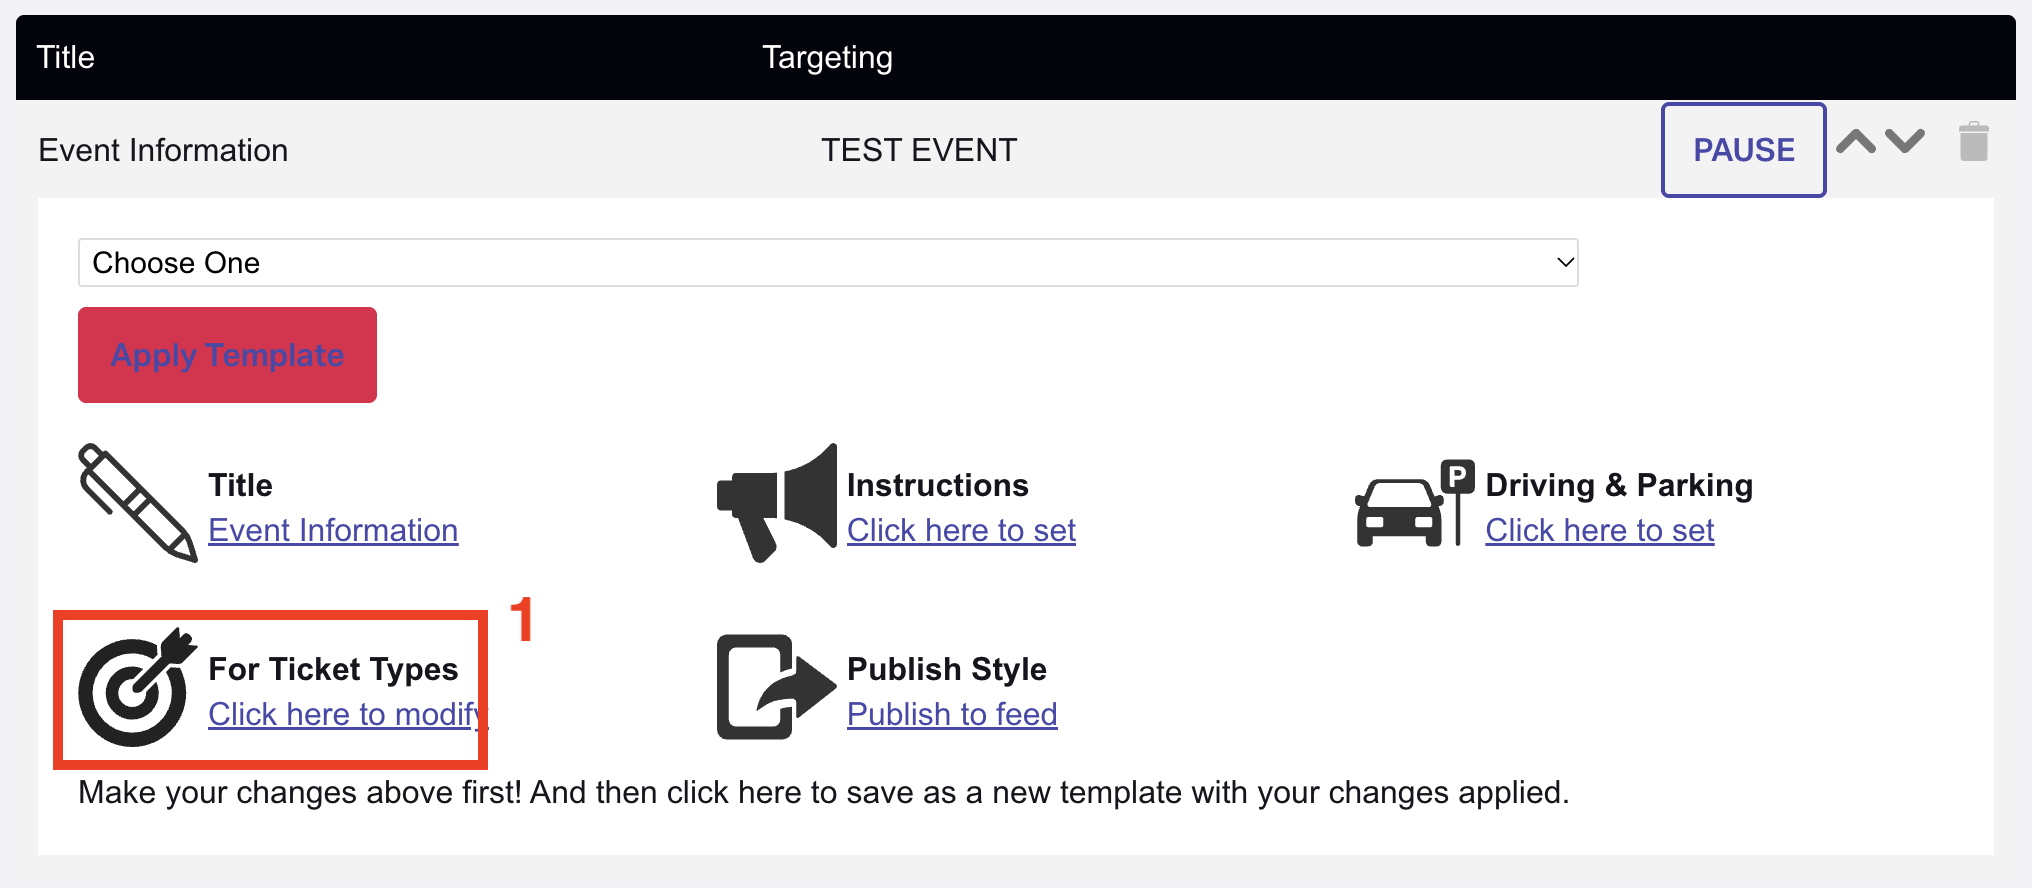
Edit Ticket Types (Who Will Receive/View This Message)
- Click Click here to modify under For Ticket Types.
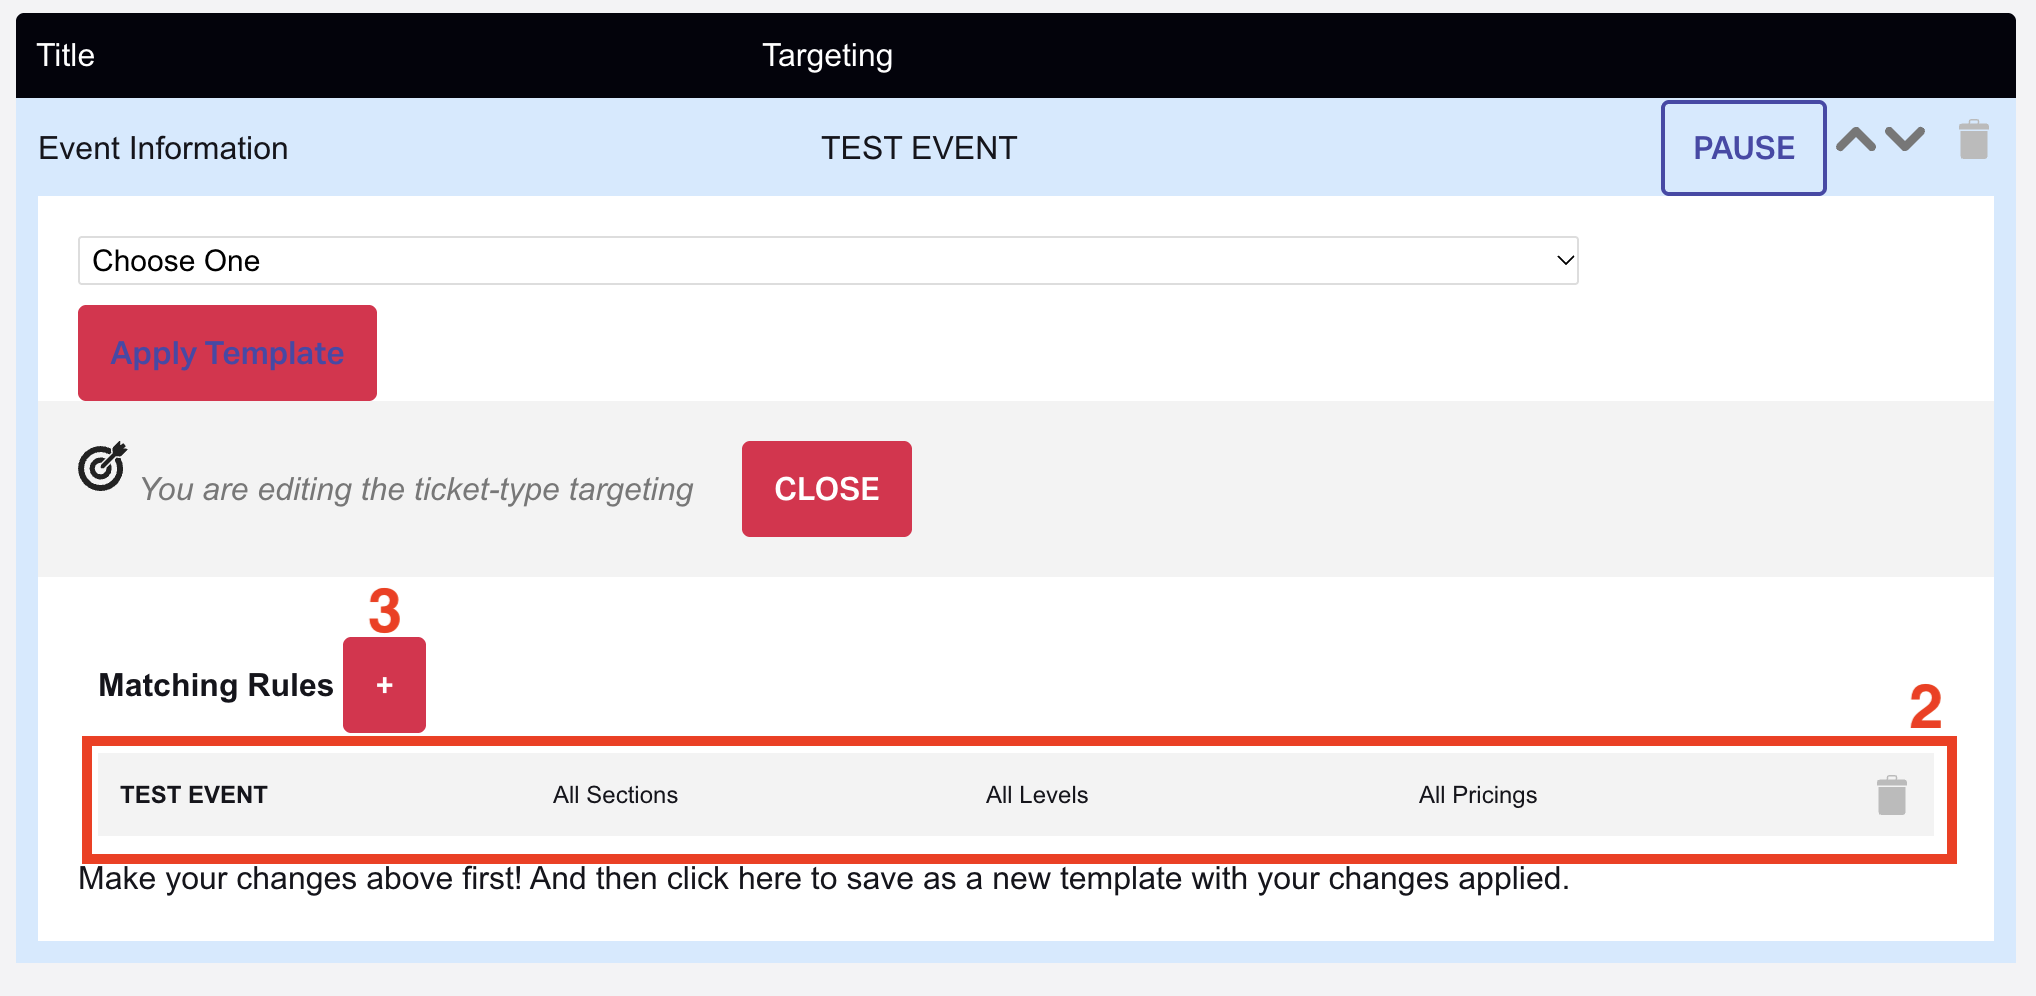
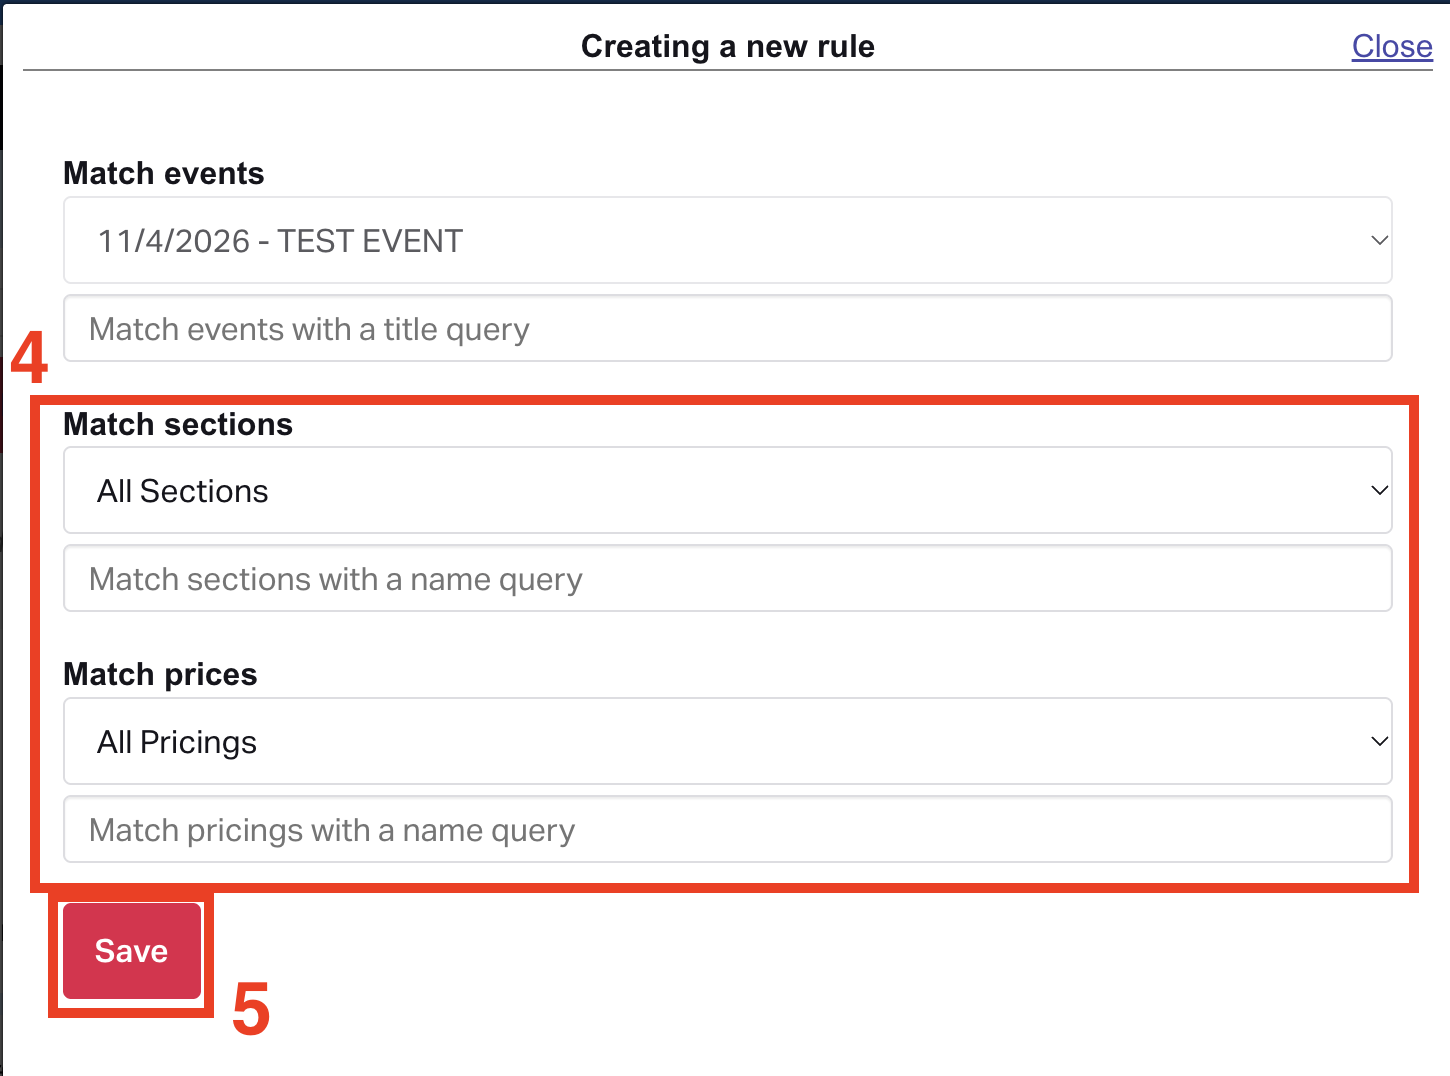
- All sections, levels, and prices are automatically applied to the message. To remove one, click the trash can icon.
- To add a new rule, click the pink plus sign next to Matching Rules.
- Select the sections and prices from your event using the dropdown menus or by typing in the name.
This can help you designate who the specific information is directed to and viewed by. For example, an entry titled "Event Information" may include information useful for all ticket holders, while an entry titled "VIP Entry Info" may only be useful to VIP ticket holders. Each entry can be set for specific ticket sections or pricing levels. Choose events, ticket sections, and pricing levels from the dropdown menu to assign an entry to a specific purchase type. For example, if an entry is set for the VIP ticket section only, only VIP ticket holders will be able to view the information provided in that entry.
Edit the Publishing Style
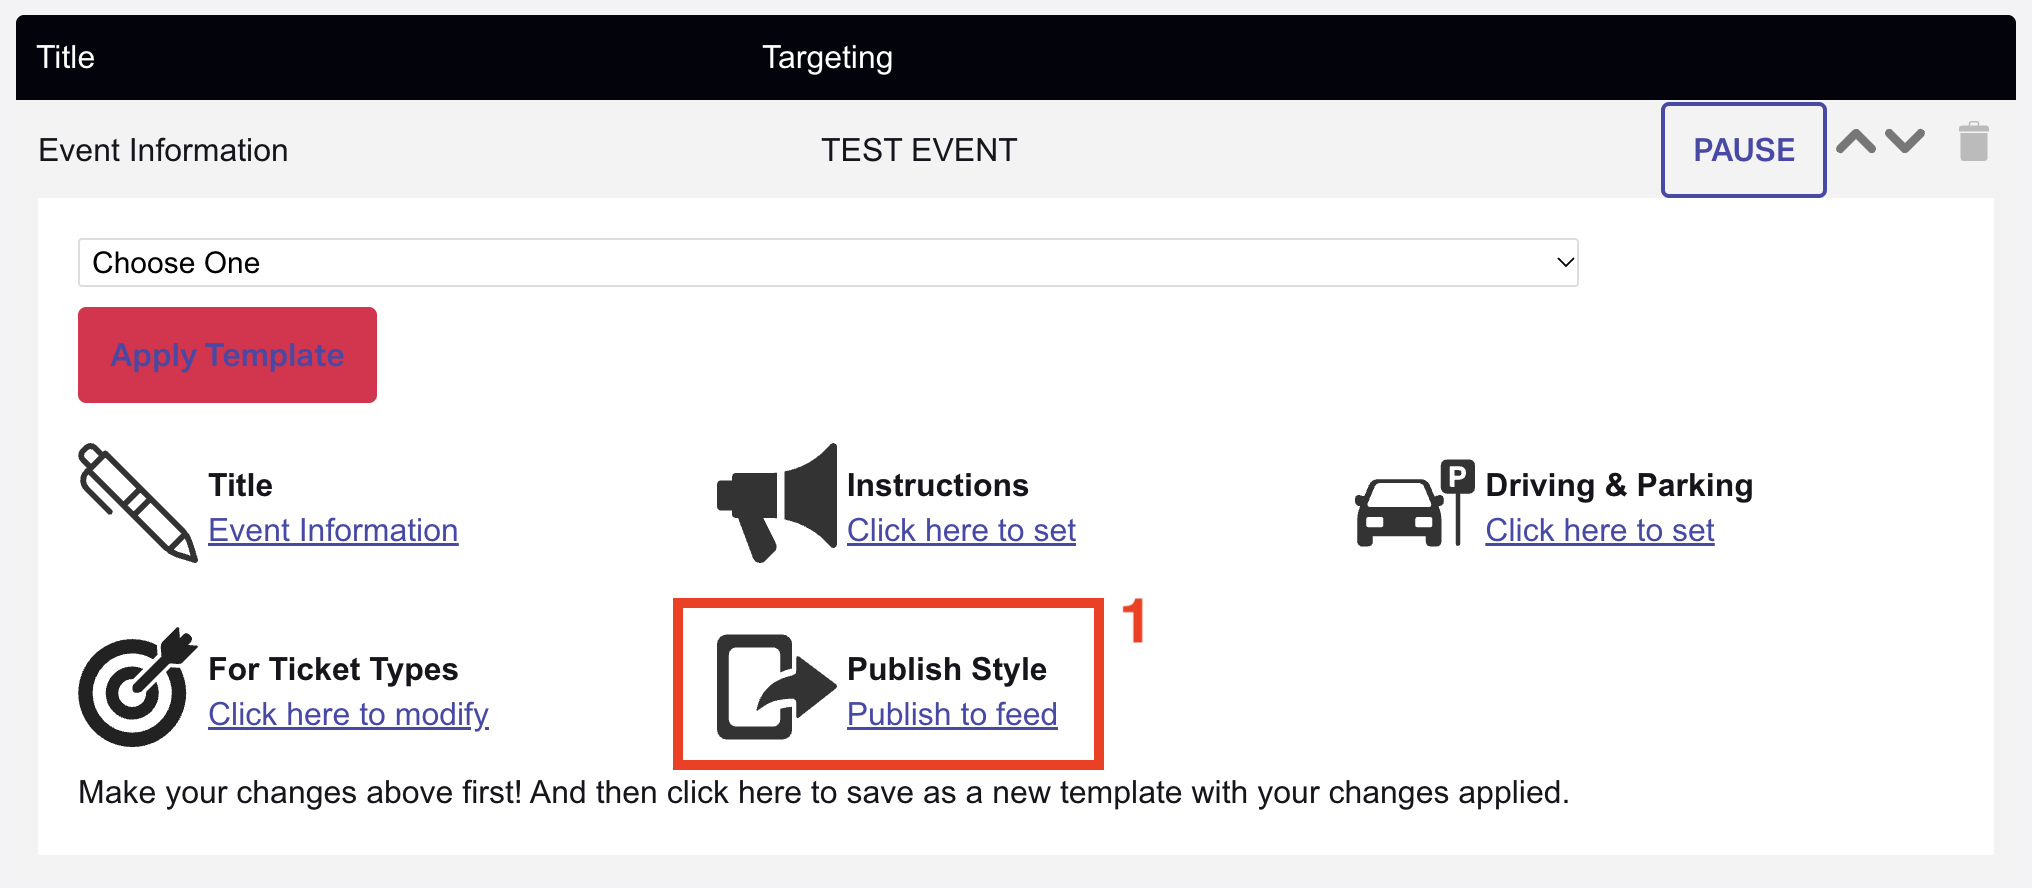
- Click Publish to feed under Publish Style.
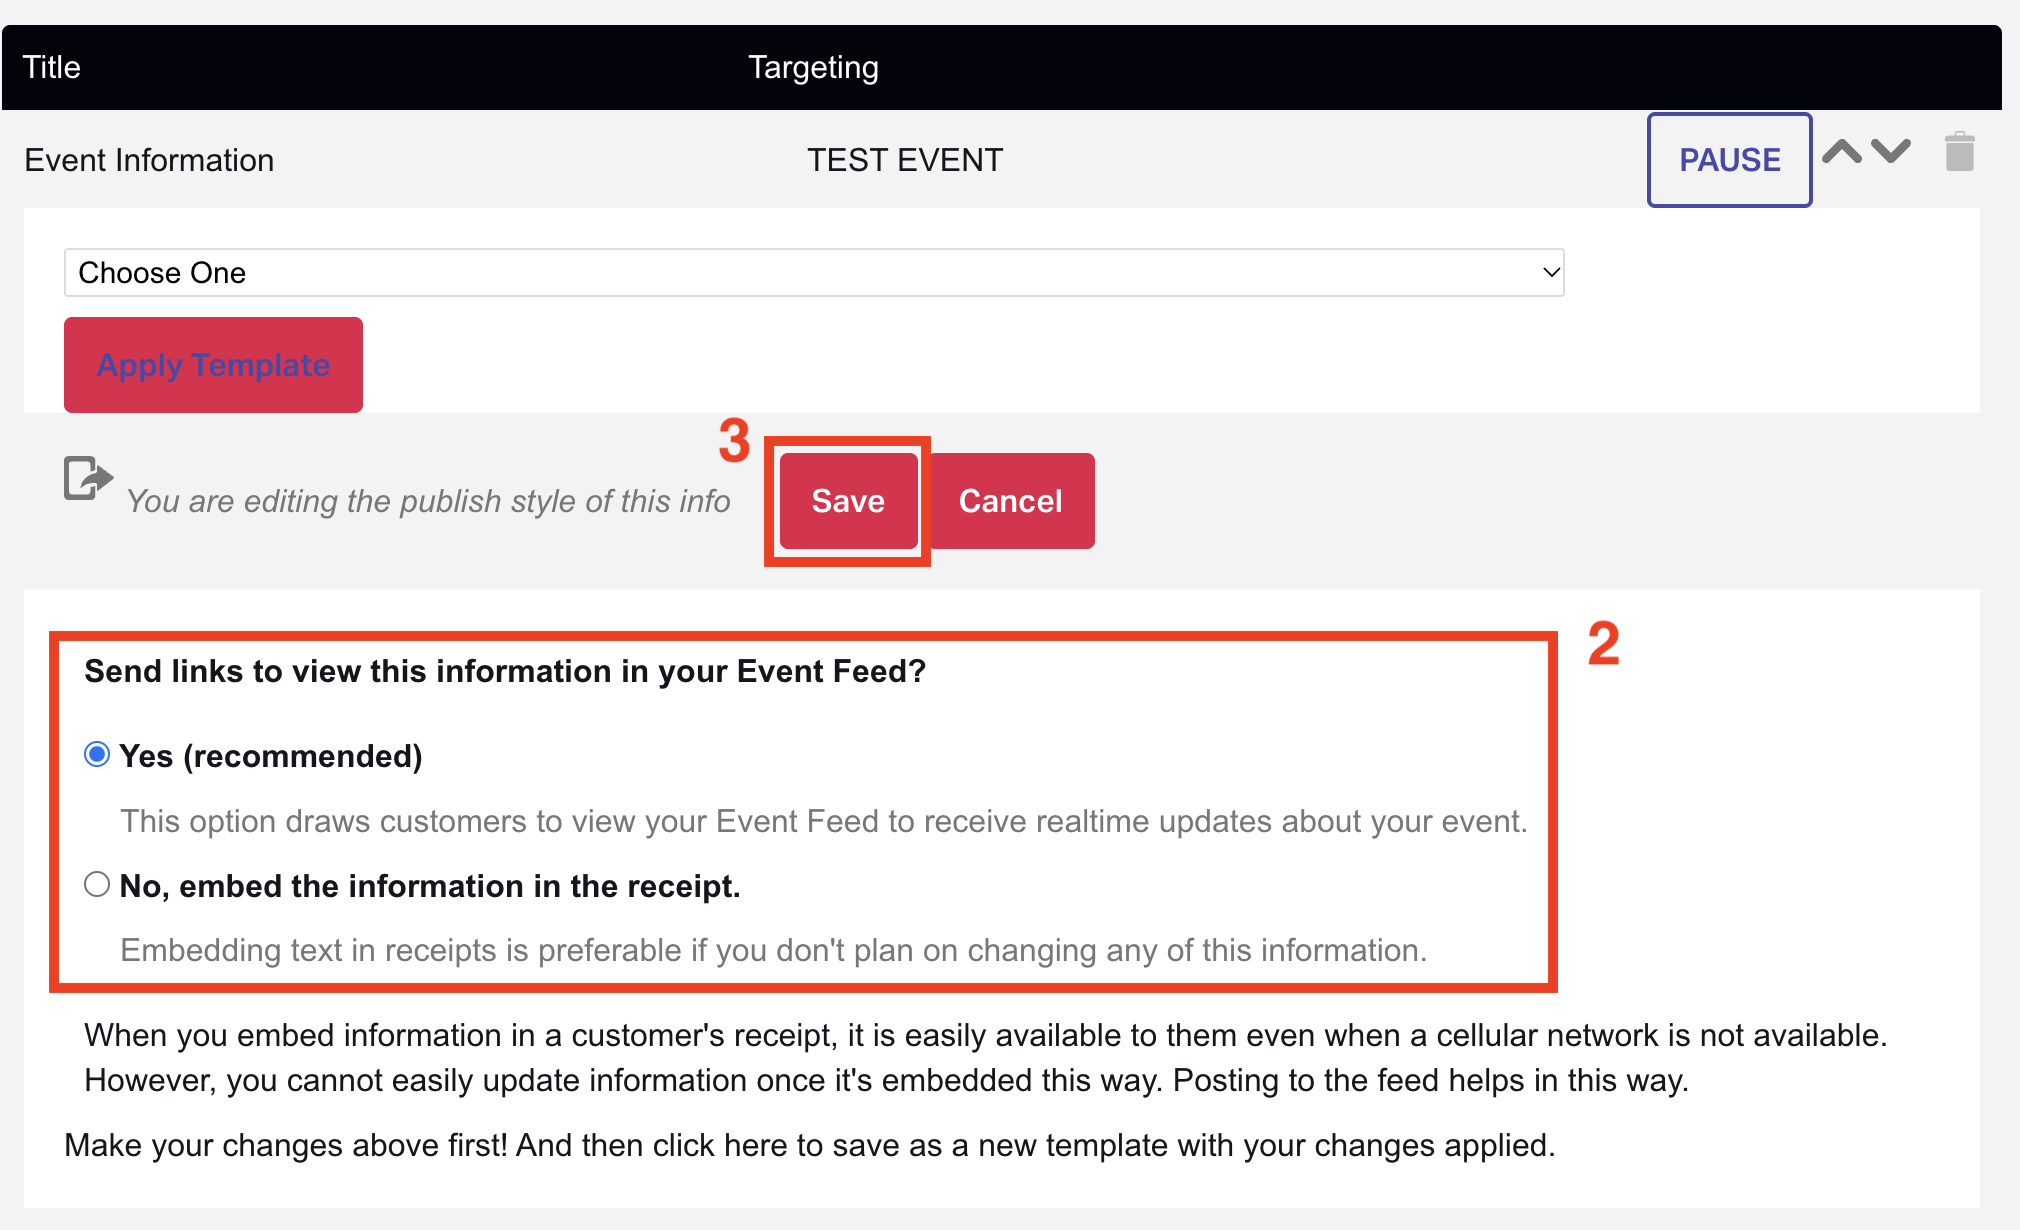
- Select how you would like customers to receive this information. Under Send links to view this information in your Event Feed?, select:
- Yes (recommended)
- This option directs customers to your Event Feed to receive real-time updates about your event.
- This is useful if you need to change or update any information before the event.
- No, embed the information in the receipt
- This option embeds the text in the receipts customers receive after purchase. This option is preferable only if you don't plan on changing any of this information.
- When you embed information in a customer's receipt, it is easily available when a cellular network is not available. However, you cannot make changes to the information after the receipts have been delivered.
- Yes (recommended)
- Click Save.
Event Info: Customer View
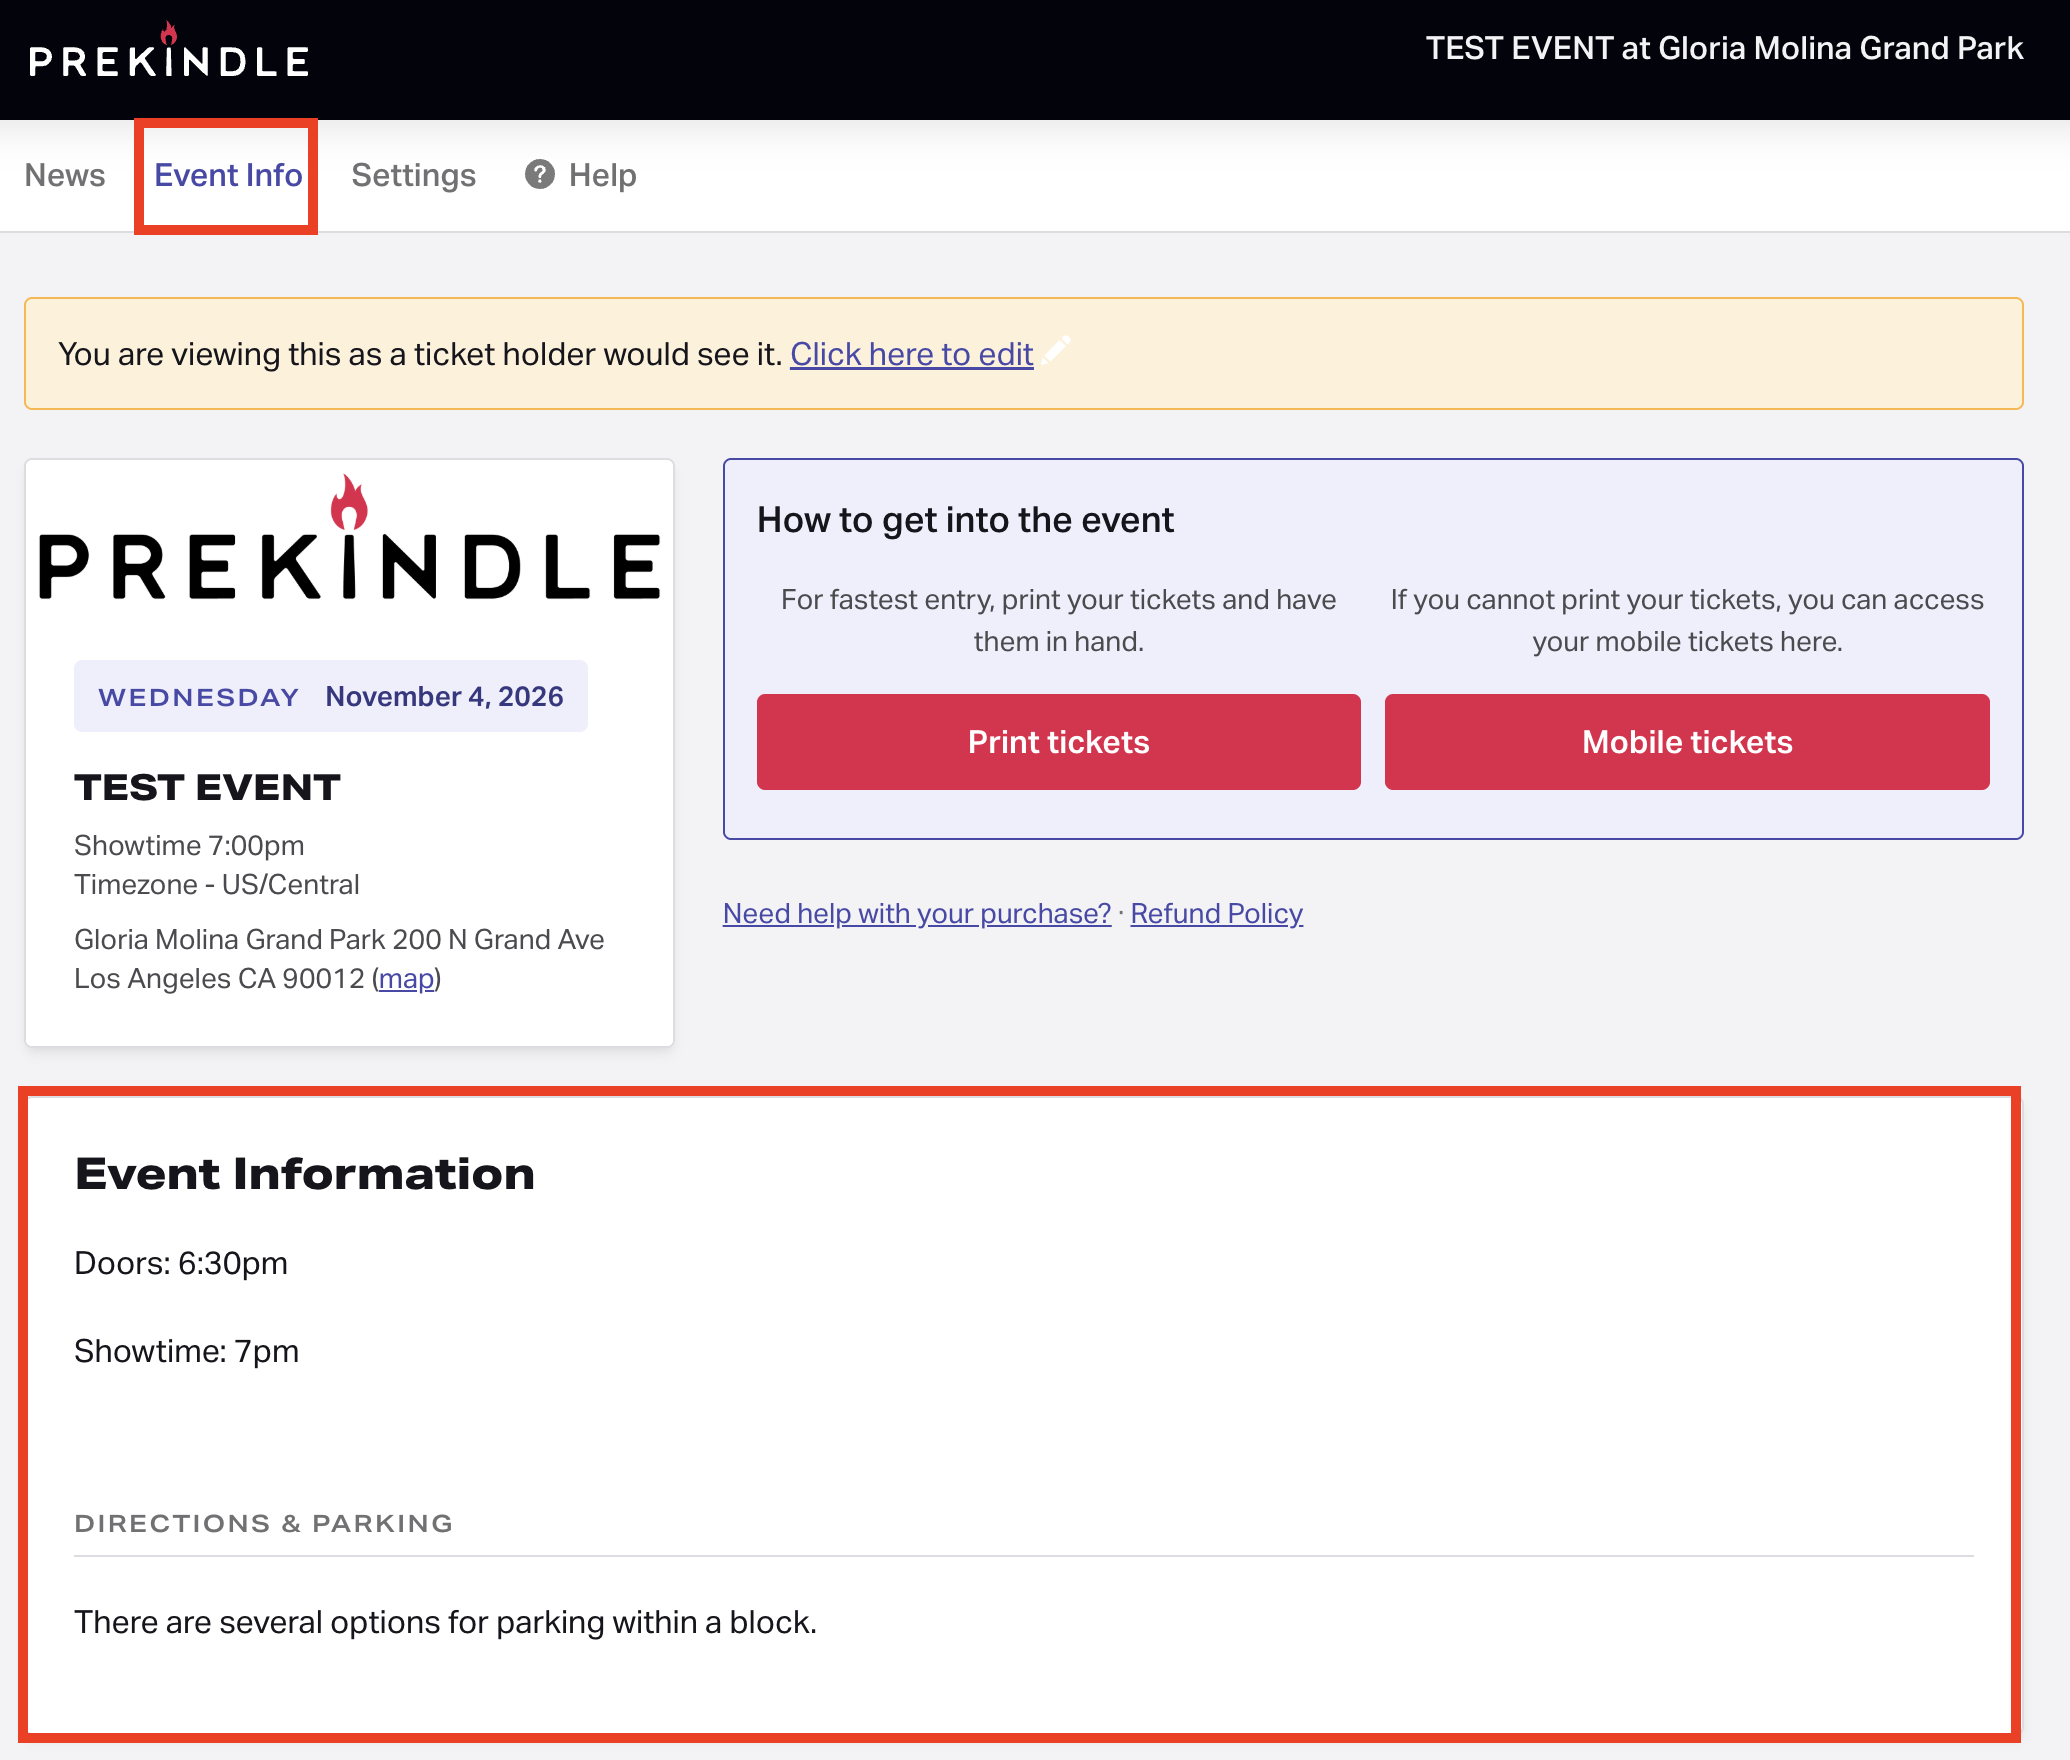
The information added to the Event Info in the steps above will be visible to the customer in the Event Info tab on the Event Feed and is accessible through a link in their confirmation receipt.
Information added in the Title, Special Instructions, and Driving & Parking steps will be visible in the area marked by the pink box. The orange banner at the top of the screen is not visible to customers.
This Know Before You Go event information is also automatically sent as an event reminder to all opted-in purchasers 2 days prior to the event
Was this article helpful?
That’s Great!
Thank you for your feedback
Sorry! We couldn't be helpful
Thank you for your feedback
Feedback sent
We appreciate your effort and will try to fix the article